
 |
|
|
Walkthrough Part 13
DAO
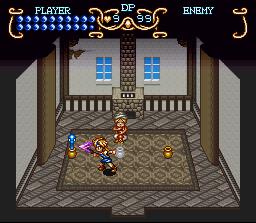
When you arrive, leave the first building then talk to the man just to your left. Yes, you are Will. :) You'll get your father's journal, which is essential to finishing the Pyramid. Go left a bit and up to reach a Dark Space, where you can save. Leave, then go right past the first two doorways. In a little alley is a guy just standing there. Yep, that's the Jeweler! If you've been good about getting jewels, you should easily have a Dark Friar powerup by now... And believe me, it's one hell of a powerup!

NOTE: If you have never used a single Herb so far, your inventory should be overflowing now! :)
If you continue right, you'll see two men talking to each other. The one on the left has something to say regarding what Neil's been doing... :) Anyhow, go up a bit, and you'll see a blue-haired woman. Talk to her for a warning from The Jackal... *gasp!*
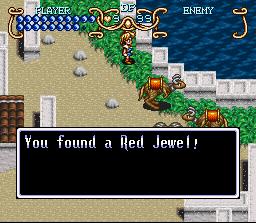
By the way, to the right of the woman are two rocks one right above the other. 3 tiles to the right of the top one on the ground is a RED JEWEL.
Do whatever you want, and then go in the building just to the right of the one you entered through to talk to Neil, who will tell you how to get to the Pyramid.
Leave Dao, and head for the Pyramid.
PYRAMID
ENEMIES/HP:
Mystic Ball/20 Tuts/30 Blaster/25 Haunt/12
Haunt's Spirit/28
NOTE: In my opinion, this place is far more amusing than Ankor Wat.
NOTE ON BLASTERS: You can't see 'em, but you can hit 'em!
NOTE ON HAUNTS: Hey, guess what? You can BLOCK the spirits that come out! Now THAT saves health!
First, go right. Psycho Slider kills the Mystic Balls rather well. After killing both of them, a Dark Space will appear. Enter, talk to Gaia for the Aura, and then transform into Shadow!
LAME NOTE: When I went through this game my third time (using massive amounts of cheats) my inventory was maxed out, and Gaia told me "Cut down on your inventory and come back". :D If Gaia tells you this, discard your Will and Lola's Letter and you'll still be maxed out on herbs!
Leave the Dark Space, but don't use the Aura... Head right. Go right until you're right at the flat part in front of the exit. Use the Aura there, and you'll wind up in a small room. Search the left pillar near the top of the room for a RED JEWEL. Use the Aura again to go down again. To return to the top, press the TALK/ATTACK button on top of the blue puddle thing, and select Jump In. Once back at the top, use Aura at the base of the staircase at the center. You'll see a Dark Space, so save!
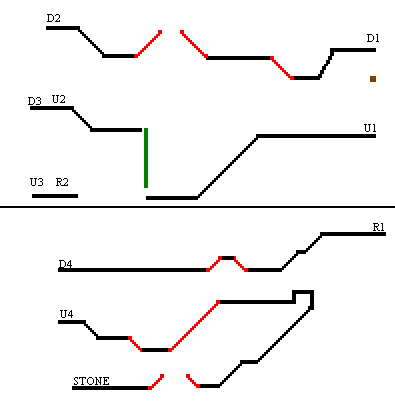
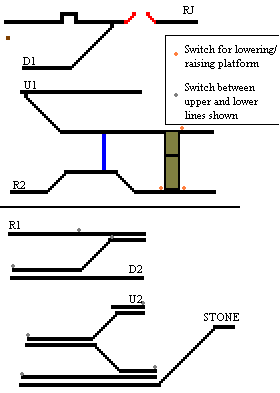
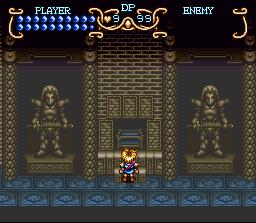
Now, there 6 doors, and each one must be done differently, with different characters. The way I'm structuring this is assuming Door 1 is on the far left, Door 2 is the one to the right of it, Door 3 to the right of door 2, etc. Got it? Good! For all of these doors, you can worry a little less about damage, because right after you finish a door, you'll warp back to the Dark Space where you can save and heal. So go all out! 8-)
1 2 3 Dark Space 4 5 6
Your goal is to get the six Hieroglyph Stones. When you finish a room, you'll warp back to the top of the Pyramid. If you're maxed out on items, you can just enter the topmost room and dump a Hieroglyph Stone there by equipping it and pressing B. Just enter them in order, except for the first two, which are switched (1 goes in the second from left slot, and 2 goes in the leftmost slot). The rest are in the same place as their respective rooms.
NOTE: If a character's name has an X next to it, you may use it to solve the door.
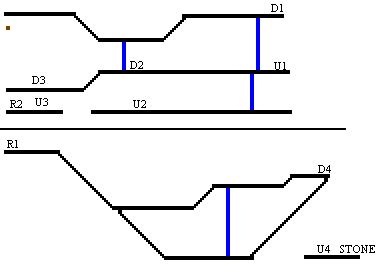
How to read the maps: U# and D# (e.g. U1 and D1) are the same staircase, just one's the top entrance and one's the bottom entrance. (U=upwards, D=downwards). RJ stands for Red Jewel, E for Exit puddle, and STONE means you'll find a blue exit puddle and door to the Hieroglyph Stone there. R1 means the door to the first half of the room and R2 means the door to the second half. (It's the same door.) A brown dot is the entrance to the room (in the first half of the room). A red surface is slippery (you need Will's Spin Dash); a green vertical line is a place to jump down; and a blue vertical line is a place where Shadow can use Aura. The third room has a special gimmick mentioned on the map itself.
DOOR 1
[X] Will
[ ] Freedan
[ ] Shadow
First, head left. Use Spin Dash to get up both ramps, and then keep taking the doorways with stairs heading down until you leave the screen. Now, head left, down the staircase, and use Spin Dash to clear the next ramp set as well. Keep going over it if you want to kill the laser orbs. Then, head left and down the stairs. Go right, and you'll see a small ramp. Start a Spin Dash before the ramp, and hold RIGHT to clear the second one as well. Go right, down the staircase, Spin Dash over the next jump, and enter the doorway. Take the Hieroglyph Stone off of the wall, go out, and jump into the blue puddle.
DOOR 2
[ ] Will
[ ] Freedan
[X] Shadow
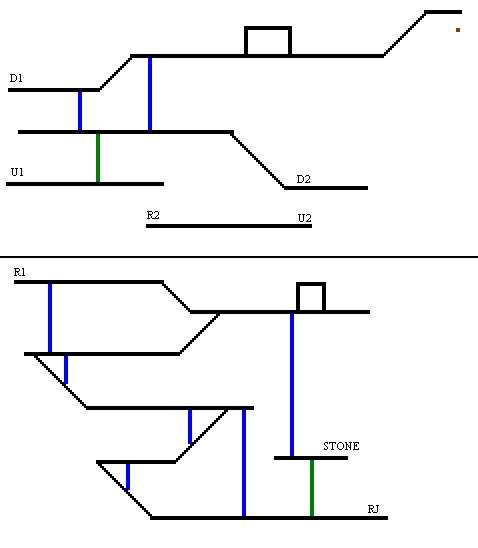
Okay, if you see a spot in this area with a bunch of bricks below it, use the Aura. Just keep going down. There's a RED JEWEL on the far right side of the second screen. To get the Hieroglyph Stone, use the Aura right below the big lion drawing on the wall. If you didn't get the RED JEWEL first, then use the Aura right below the doorway leading to the stone.
DOOR 3
[X] Will
[ ] Freedan
[X] Shadow
If you use Will, you can get a RED JEWEL by Spin Dashing over the ramp. However, you need Shadow to win. On the second screen, just keep stepping on tiles. Easy stuff.
DOOR 4
[X] Will
[ ] Freedan
[ ] Shadow
Most of this is one-track. Keep going; the only split path in the first half of the room is a room which has two upward staircases. The right one leads to an exit puddle, and the left one leads forward. In the second half you have a choice of going down the stairs (both staircases you see lead to each other; there's nothing else there) or heading right. Do so to continue. At the end, there's a staircase down that leads to about 6 Haunts and a chest with a RED JEWEL in it. Go back up and head right. Here, use Spin Dash to get over the ramps; try to time it right so you don't get battered too much by the descending spikes. Keep going right to reach the Hieroglyph Stone.
DOOR 5
[ ] Will
[ ] Freedan
[X] Shadow

Use the Aura at the point which is straight above the treasure chest (Hit START to use your map) for a RED JEWEL.
DOOR 6
[X] Will
[X] Freedan
[X] Shadow
I advise you use Freedan... It's more fun. No, you don't need Aura, because a good amount of the Haunts that come out of the wall have staircases behind them... i.e. Walk into the place the mummies walked out of.
Finally, go through the door you keep arriving in after each door is finished. Obey the voice, and walk left. The Jackal will show up! AAAAA! After you hear another voice tell you to play the flute, you should freeze-frame if you're using an emulator (this part is fun), GET AWAY FROM THE STATUE ON YOUR LEFT, and use Lola's Melody. Yeah, this is why you never forgot it... KABOOF! No more Jackal. :)
Why does this work? Well, if you talked to the guy in the room you're in now before you started solving doors, you'd know. ;)
To solve the wall puzzle, reference the journal in your inventory. A blue puddle will appear outside. SAVE SAVE SAVE!!! You may fight with whoever you wish. I advise using Freedan, because Dark Friar makes life a lot easier for me.
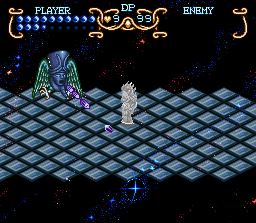
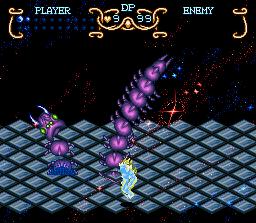
BOSS: MUMMY QUEEN; HP-40
STRATEGY: If you're all nice and upgraded like me, this is a snap. :)
Anyhow, when the queen solidifies, hit her. Then, get away, cuz she'll
explode into 8 spirits. The 8 spirits will then attempt to seek you out,
and NO, you CAN'T kill them! Then, the spirits will re-combine into the
queen. The queen does occasionally fire energy balls at you from her
staff. Avoid them. After she drops below 1/2 health or so, instead of 8
random spirits, you'll get a ring of 8 that follows you. 7 of them
flicker, but one remains solid. Hit the solid one and she'll reform.
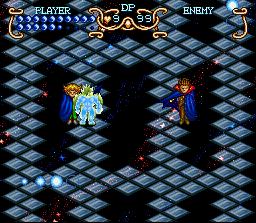
The best way I find to dodge the 8-seeking-spirits attacks is as follows:
If you're on the lower level, stay near a teleporter. When they start getting near, take the teleporter up, charge a Dark Friar, and hit her.
If you're on the upper level, try to get between them, but when they start getting close, jump off the ledge.
If you're using Freedan with an upgraded Dark Friar, detonate it within the spirit ring to quickly neutralize it, then run right up to the queen and smack her with your sword.
I finished this boss with less than half my health gone and didn't use any Herbs. EASY!
FINISHING DAO / TOWER OF BABEL
If you want, you can play Snake Panic. It's in one of the buildings near the top, so look around. If you do good (I got 76) you get two RED JEWELS.
Okay, now save, and talk to Neil. He'll take you to the Tower of Babel. Notice that two parachutes dropped off...
Search the altar where you supposedly found the flute for the final RED JEWEL. Continue right and try to pass through the lasers. You'll find the Crystal Ring! Equip it, and pass through. There's only one way to go, so talk to spirits along the way. When you see a metal-framed doorway, go right, enter the Dark Space, and SAVE! Then, enter the doorway.
NOTE: You will now fight each boss again as Shadow. Yeah, they all LOOK harder, but I think that with Shadow, they're all easier. After each boss, continue and a doorway formerly blocked by lasers will open up.
Good luck!
BOSS DIFFERENCES:
CASTOTH: Fires off two sets of triangular fireball things at once instead of one.
VIPER: 6-shot goes faster, 4-shot goes slower, significantly more damage.
- Shadow has long arms, so you can smack him when he fires the diamond
gun now! Just be cautious
VAMPIRES: The big fat energy-ball attack goes faster, both seem to do slightly
more damage. In my opinion, another difference is that it no longer
takes Herbs to defeat them. :p
NOTE: If you lose lots of health to the vampires, I say restore from a save until you lose little more than half your health, because you can't revive yourself between them and the next two without using Herbs.
SAND FANGER: Goes faster? I dunno
Okay, now go outside, talk to the bird thing, and he'll take you up. Go left, and into the door.
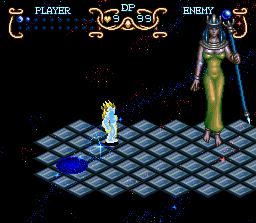
MUMMY QUEEN: Stronger, I suppose. Be extremely careful. You might have to use an herb here. Well, this time you're injured as well. Difficult!!!
Now, you'll be able to save one last time. If you want to return to Dao for any reason (Wanna trade in that final Red Jewel, perhaps?) talk to the spirit and request to be returned. You won't have to re-fight the bosses, don't worry. If you do have all 50 Jewels, you can enter Gem's Mansion (see last section).
From this point forward, it's no turning back! Eventually, you'll reach a room with bones in them. Talk to them. Really, you can. You'll hear Will's father explain quite a bit. I never knew the Camel was a biological experiment... hehe Talk to the spirits on the roof all you want... The spirit on the upper-right is the Russian Glass player.... When you're done, talk to the center spirit, then to Kara. Prepare for the final battle!
MY FINAL STATS: (Copied from the "Cond." item from the menu)
HP 40/40 (Contributors, I OWE YOU ONE!)
DP 99 S9 (Hell yeah!)
STR 29
DEF 32
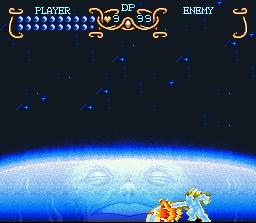
BOSS: CHAOS COMET / DARK GAIA; HP-20 and 40
STRATEGY: This boss has two stages:
1.) The comet itself... Okay, when it opens its mouth, shoot its mouth with a firebird. That's right, you shoot projectiles now! Avoid the energy storm, obviously. Each energy spike does about 5hp damage.
2.) When it fires two large green energy balls at you, use Telekinesis to deflect them. Kill as many of those pesky little blue balls as you can. When the boss opens her mouth, fire at her head about 4 times then GET BACK OR GET BLASTED! Took me 2 tries to win this one. Second time I didn't use any Herbs...
My personal strategy for beating Dark Gaia: Stay in the center, right at the bottom, facing upwards, hitting ATTACK as much as possible. When I see green energy balls, I hit L or R to block them. Because of how Shadow attacks, any blue balls that get too close get knocked anyways. When the boss suddenly starts taking damage, I move, and when she fires, I move back.
Now, sit back and watch the dreadfully boring ending... You've won!
GEM'S MANSION
ENEMIES/HP:
Flayzer 2/20 Grundit 2/30 Eye Stalker 2/16
"50... Suddenly you've gathered 50 Red Jewels... The time has come to tell you some of my secrets. Follow me!!"
Hence starts your journey into Gem's mansion... That is, IF you got all 50 Red Jewels! Yes, the enemies here are the exact same as the Diamond Mine, except they'be been pumped up, and the Eye Stalkers have many more constricting spaces to nail you in.
I WILL WARN YOU AHEAD OF TIME: YOUR REWARDS FOR ACCOMPLISHING THIS INCREDIBLY ANNOYING TASK IS AT THE ABSOLUTE MOST ONE SINGLE HERB AND SOME DARK GEMS! You don't even get an upgrade jewel for killing all of the monsters!
Okay, the whole thing is essentially a one-way course, except for two points:
1.) There are two thin passages headed down and one hallway heading right.
Take the lower-right passage.
2.) You can jump off the staircase, or go up a hallway past the end of
it. The hallway leads to two Eye Stalker 2's and a chest with a herb in
it. Wow. You need to go to the base of the stairs anyways.
I will bet that a lot of people get stuck when they reach the first staircase. To get by it, Psycho Slide under the left side of it!
Eventually, you'll reach a doorway, where you can fight Solid Arm. What's
so great about Solid Arm? Well, a few things are revealed, and one major
storyline component uncovered:
1.) Solid Arm was a boss in Soul Blazer, the prequel to Illusion of Gaia.
2.) Solid Arm was defeated by Blazer, and scattered into 50 pieces we
like to call "Red Jewels"
3.) Gem was the head of the whole labor trade operation! He's been using
slaves to attempt to dig up the Red Jewels.
4.) Now that he's back, you have to beat him!
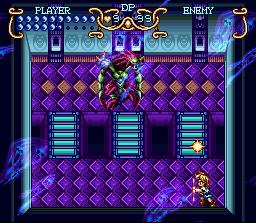
BOSS: SOLID ARM HP-40
STRATEGY: Hey, you thought the vampires were annoying as hell!? Enter
Solid Arm! This guy is a PAIN! Only 1 damage per hit means expect this
to be a LONG fight... Or maybe not, if you die fast enough. His persistent
fireball attacks are very hard to block (Try standing near the corners) and
you can't attack him from the side.
Well, here's the extremely basic strategy: Don't use the center conveyer unless you like pain. Try to lure him to the side conveyers, block fireballs (difficult, but possible), and then jump-attack him. This takes a long time!
ALTERNATIVE STRATEGY:
(Submitted by Gerko)
Another method is using Spin Dash repeatedly, and charging a new one while
doing the one you're on. This maximizes damage and minimizes
vulnerability. Try it, it might work!
"A quiet voice is heard. I was defeated again... Blazer was strong, but you are stronger... Danger approaches this planet. You should hurry to the Tower of Babel..."
Yeah, if you look around, you don't see the Jeweler Gem anymore either... And you thought you'd actually GET something for searching every last corner of this game... :P