
 |
|
|
Walkthrough
- This walkthrough is
for normal
mode. For other modes, the items, enemies, and shopping lists can
be different.
- I have capitalized specific location
names, item names, and enemy names for emphasis.
- When an item can be obtained, I have
put it in bold type.
- I have given the puzzle solutions, so
if you want to solve them on your own, be careful about how much you
read.
- In several places, I have listed the enemies in table format. This is usually after you have already been through the areas, but a certain event triggers their repopulation. This will allow you to clear them out in whatever order you prefer, without having to follow a walkthrough.
- If you press Δ while on the map screen,
you can see the most detailed name of your current location.
- I would recommend using more than one save file for this game. I usually suggest saving the game when you're close to a phone, haven't saved for a while, or are about to fight a tough battle. This does not mean that you shouldn't save more often - only that I think you shouldn't save any less often. Use your discretion in this matter, and remember that it is always best to err on the side of caution. Seemingly weak enemies can take you down, so don't be overconfident.
M.I.S.T. Center, |
|
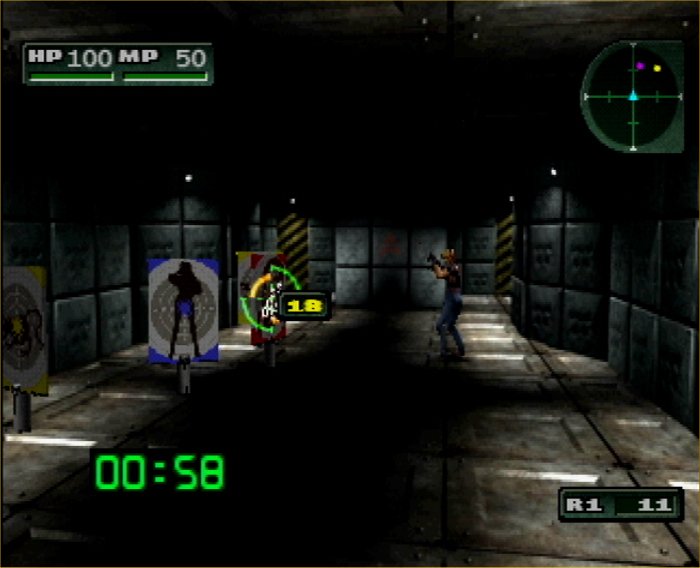
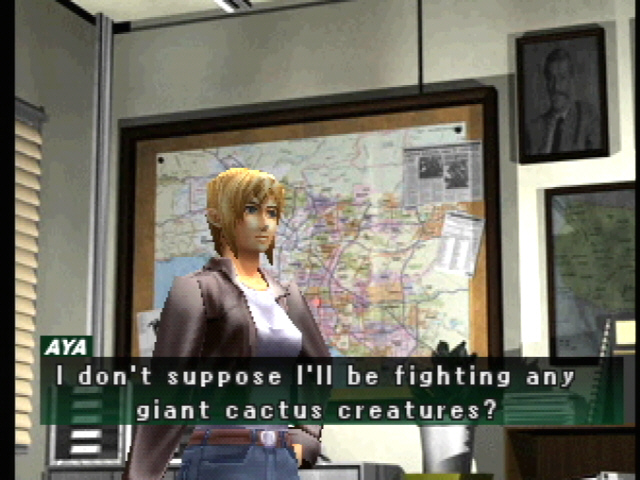
| Aya Brea, formerly of the NYPD, is now an NMC (Neo-Mitochondrion Creature) hunter for the FBI, working as a member of the Mitochondrion Investigation and Suppression Team (MIST) in LA. The creatures whose existence she discovered in Parasite Eve are now appearing in the western part of the country, and several bizarre incidents have occurred. There are now ANMC's, or Artificial Neo-Mitochondrion Creatures, which appear to have been created deliberately. You join Aya at the practice range, where she is honing her NMC-elimination skills. |  |
| Before beginning the walkthrough, I want to point out that controlling Aya's movements in the sequel is quite different from controlling them in the original Parasite Eve. Those of you who have played Resident Evil or Dino Crisis will not find this type of movement unusual, but it requires a little adjustment time for someone who is not accustomed to it. The up arrow key always moves Aya forward, and the down key always moves her back, regardless of the direction she is facing. You will need to keep in mind that all directions are from Aya's point of view rather than yours. | |
 |
At
the practice range, you can choose the difficulty setting for the
practice
session, as well as the background music you prefer. You will
need to
press the square button to find a target and the R1 button to
fire. When
you are out of ammo, pressing the R1 button will also reload. In
this
case, it will load your M93R with 20 9mm PB rounds. These will go
quickly, and you will have to reload often. It is important
throughout the
game to keep the appropriate ammo container attached to your
armor. You
can do this by pressing the Start button to open the attachment menu
and
selecting the ammo box to attach. With your attachment menu open,
you can
always reload by pressing the X button on the ammo box. |
| During the training portion, I usually reload when there is a second's break in the appearance of targets, even if I am not yet out of ammo, so I don't get caught without any while trying to take out a target. Time is an important commodity here, as the targets will disappear after a certain time if they have not been eliminated. | |
| Level 1 starts with an untimed practice session/tutorial. You will be shooting at stationary yellow targets, and you will move into a session with a time limit of one minute. Level 2 gives you two minutes, and moving orange, yellow, and red targets. The yellow targets are worth 200 points each, the orange worth 400, and the red worth 600. The greater the point reward, the stronger the monster, so more shots will be required to take out the orange and red targets. Also, the distance to the target is a factor. |  |
 |
Level 3, with a three minute time limit, requires you to enter the shooting range. Walk to the back, and examine the red "A" on the wall. Add the GPS (Global Positioning System) to your armor attachments by doing the following in the attachment menu: Use, select GPS, and move to armor. On this level, there is another type of target - blue targets. These are human, and must not be hit. The point deduction for doing so is brutal. You must be very careful with them, because they can be hit even if you have targeted a monster and the human moves between you and that monster. |
| Level 4 requires you to examine the "A", and allows the use of our old friend Parasite Energy, or PE, from the original Parasite Eve game. Press the triangle button for the PE menu and use the arrow buttons to select the one you want. Use the X button to activate the chosen PE. Use of PE will deplete MP (magic points). Be warned that there are a lot of targets and they move fast. To make matters worse, the game seems to want to target humans first (or maybe I'm just paranoid). I had a hard time avoiding the blue targets here, and there are several. Level 5 is another "examine the A" level, and will allow item attachments. If you stand still too long on this level, you will be shocked by a burst of lightning from the ceiling. Nice. However, there is a purpose to all this, besides familiarizing you with the new battle system. BP! | |
| BP, or bounty points, are a wonderful thing. They serve Aya as money in this game. The more bounty points Aya earns, the more weapons, armor, items, and ammo she can trade them for throughout the game. Aya earns BP for her time on the practice range if she performs well enough. A high score on a training session will result in a BP bonus. Aya can also earn rewards, in addition to her BP bonuses, if she performs extremely well. Note that this is only true the first time - repeat sessions on a level where bonus BP have already been earned will not result in additional BP. Here is the NMC point chart: | |
|
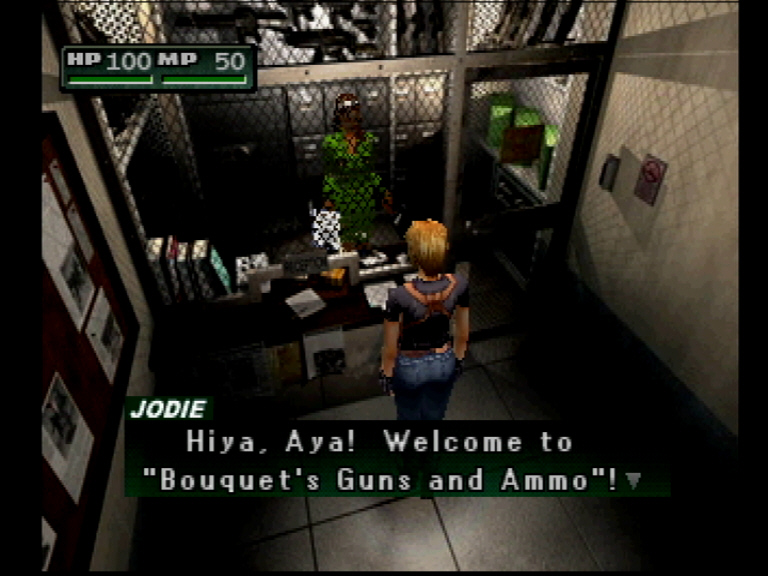
| When you are finished, go out the door, and then turn and go through the set of glass double doors next to the door you just came through. Talk to Pierce, and he will tell you about your next assignment. Take a minute to read the bulletin board, then go through the door beside Pierce. Down the hall, enter the Firearms Control room and talk to Jodie Bouquet. The first few times you talk to her, she has some interesting remarks to make about Pierce. She has the following available: | 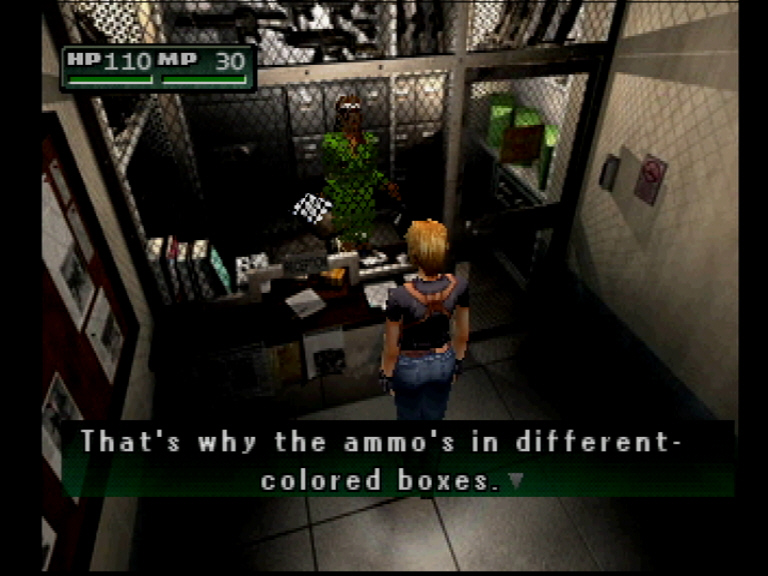 |
Weapons
| PA3 |
Pump-action 12-gauge shotgun. |
1000 BP |
| M4A1 |
5.56mm assault rifle.
Customizable with attachments. |
2450 BP |
Ammunition
| 10 Buckshot |
12-gauge shotgun scatter
shot. Spreads 9 lead shots in a burst. |
60 BP |
| 80 5.56mm Rifle |
5.56mm full metal jacket
rounds. For rifles and light machine guns. |
100 BP |
Armor
| Turtle Vest |
NMC Hunter reinforced
vest. Can be worn under regular clothing. |
1680 BP |
| Combat Armor |
Heavy police body
armor. Helmet amplifier prevents Silence. High-sensitivity
motion detector. |
3250 BP |
Items
| Recovery1 |
Multi-vitamin tablet - heals
some HP. |
100 BP |
| MP Boost1 |
Spring water - restores some MP. |
320 BP |
| Penicillin |
Anti-bacterial medkit - cures
Darkness, Paralysis, Poison. |
80 BP |
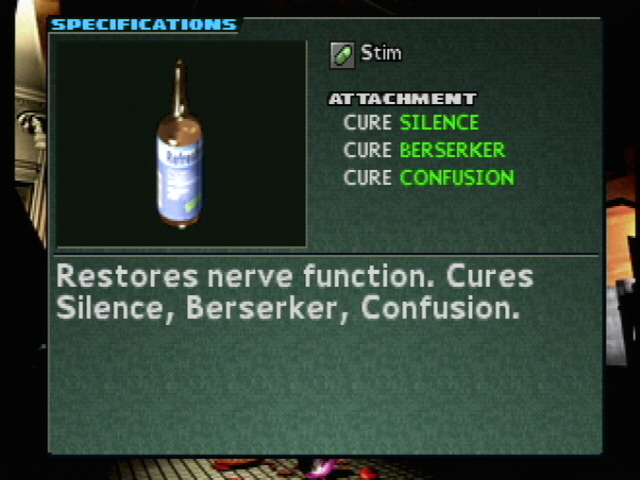
| Stim |
Restores nerve function - cures
Silence, Berserker, Confusion. |
80 BP |
| Combat Light |
Disposable defense weapon -
blinds enemies in front of you. |
60 BP |
| Pepper Spray |
Disposable self-defense weapon -
use to stun surrounding enemies. |
100 BP |
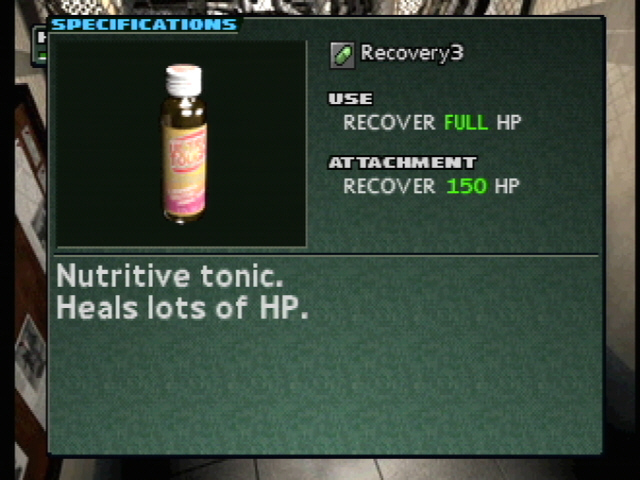 |
Continue
on down the
hall to the garage. Talk to Pierce, but don't leave yet.
Instead, go left and search the shelves for an item
- ?
Bottle. Open your inventory and select the item, then press
the
triangle button. The bottle has now been identified as a
Recovery3.
This is a great item, and you will want to save it for later when you
have more
HP. Recovery1's will work fine for now. Walk toward
the
garage exit and pick up the phone. Call your boss, Baldwin, to
get
chewed
out, and then save the game. Now you can either tell Pierce that
you
need more
practice and return to the range, or tell him that you are ready to
go. |
| Let's
take a little time to discuss experience, Parasite Energy,
inventory
management, and BP. |
|
| Experience gained in the game can be used to reactivate Aya's "sleeping" Parasite Energy powers. They are divided into four elemental categories, each of which has three powers, and each power has three levels. Only two powers per category are available at first, but after both PE's of a category have been activated and raised to Level 3, the third power becomes available. When you have enough EXP, you can choose a PE power to awaken. Once they have been reactivated, these powers can be used in battle (healing can be used outside battle, as well). To use them, press the triangle button and use the directional buttons to rotate them until you have the one you want to use, then press the X button. | 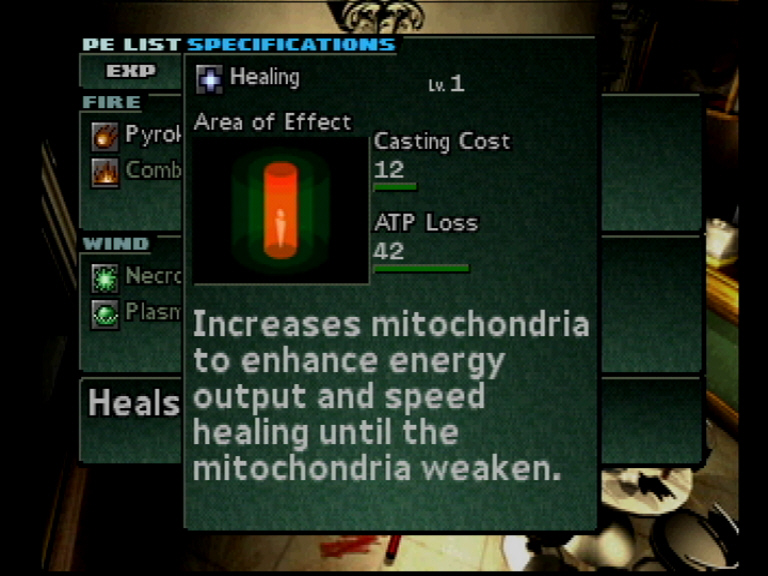 |
| Any
item in your inventory that you want to be able to use in battle
must be attached
to your armor. Only the things attached to your armor will be
available
to you once an encounter begins, so make sure that you have ammo and
some
recovery items attached at all times. If you run out of ammo in
battle,
you will have to depend exclusively on PE, and the MP to use it will
quickly be
depleted. You can run away from normal encounters, but will
suffer a BP
deduction if you do so. That's not good, so try to keep your
attachment
slots filled. |
|
| BP, or Bounty
Points, awarded
for defeating enemies, are your only
"currency" in the game, so you should never pass up a battle.
Any time you see a "hot spot" on the map (areas which are red), fight
whatever you find there,
even if
it's in an area that you don't have to pass through for the storyline
to
progress. If you are low on health, heal before entering a hot
area, but
don't ever skip one completely. A certain amount of MP is
recovered after
battle, depending on the enemy or enemies defeated, so sometimes it is
possible
to find an easier battle to recover a little MP before taking on a more
difficult one. Then you can use that MP to heal, if
necessary. That
is part of the reason I try to tell you in detail what enemies
you will
fight in each area. This should enable you to use a little
strategy to
choose the order of your battles in most areas. |
|
| When you are ready, tell Pierce, and you will be on your way. | |
PART 2: AN EVENING AT THE AKROPOLIS
Akropolis Tower, |
|
| You will see a cutscene about
the |
 |
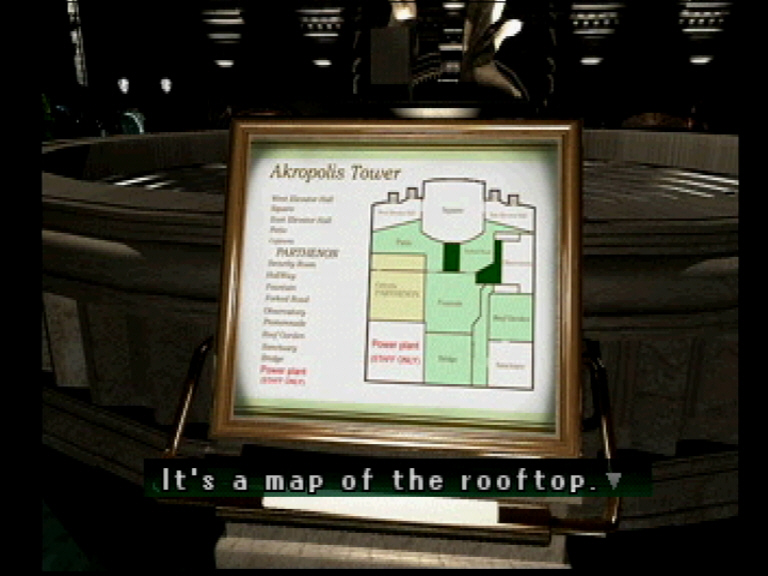 |
Go through the double doors beside the phone into the elevator hall. You will be stopped by a surviving SWAT team member. He tells you to go to the cafeteria to rescue a woman, and gives you the Cafeteria Key. Return to the square and check the map of the rooftop area in front of the fountain. Aya will enter the information in her GPS. You can look at the map by pressing the Select button. A blinking red light indicates your next destination, and a red arrow shows your current location. The map feature will be a very important one throughout the game. White areas have been explored and are clean, gray areas are unexplored, and red areas are "hot." |
| Turn around and check the body by the window across from the sign to get a Recovery1. Go down the stairs (stand in front of them and press X) to the landing. There is an ammo box lying on the bench - refill your 9mm P.B. rounds from it. Across from the ammo box, the body of a SWAT team member is draped over the railing. Search it for a Recovery2. Continue down the left stairs to find yourself on the Patio. Look at the map and notice that the area's red, which means that enemies are present. Turn and walk toward the door that leads to the cafeteria. You'll see a SWAT member being attacked by a Grin Stranger. As you get closer, the screen will flash white - this signals the beginning of a battle. You can take this enemy out fairly easily, as it is not terribly strong. Talk to the man, and he will tell Aya that "they're not what they seem" before he dies. There is a sign beside him that says "Parthenon Cafe." Walk to the door and press X. Aya will open the door with the Cafeteria Key. | 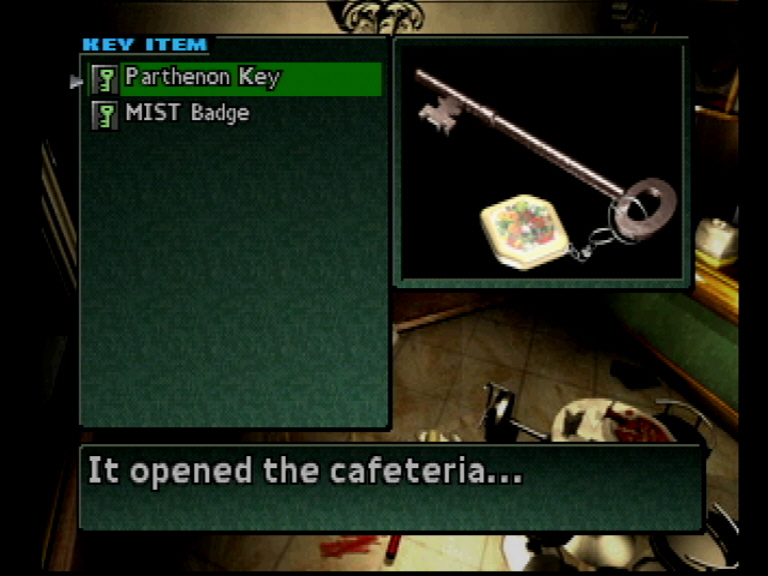 |
 |
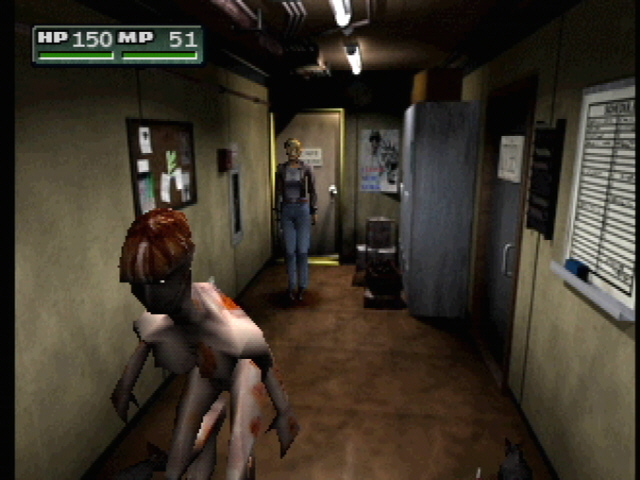
There is a woman sitting at a table reading a magazine, and Aya will automatically approach her. The woman falls to the floor and transforms into a Greater Stranger. Keep the table between you and fire at the boss till it goes down. It will drop a Recovery2. Look at the magazine the woman was reading - it is a scientific journal open to an article on mitochondria. Pick up the magazine. Look at Key Items in the inventory, and press the triangle button with the magazine selected. It is the September issue of a magazine entitled "Mendel." The article makes some interesting reading. |
| NOTE: Throughout the walkthrough, I will tell you what items are dropped after enemy encounters, but later, this will depend on what you have attached to your armor. After a certain point, you will not get bonus items if you aren't using the same attachments I am using. I will mention this again when that point comes. | |
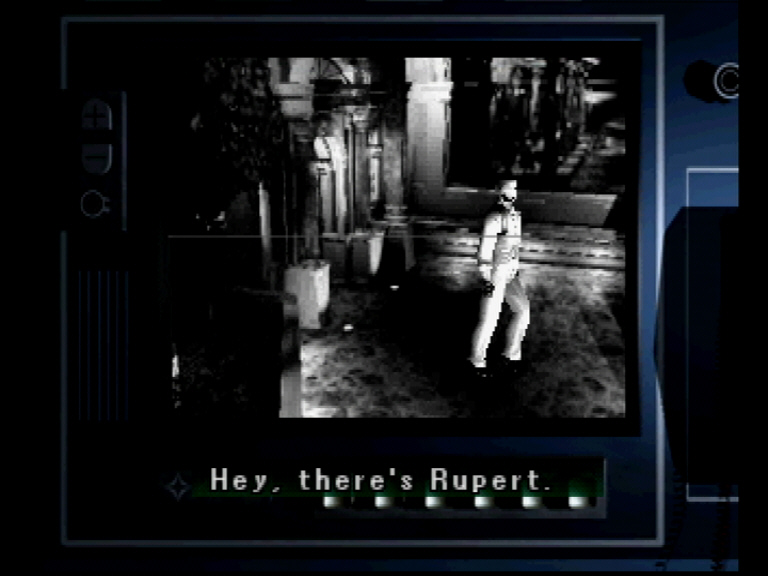
| Examine the creature and get the Metallic Implant from behind its ear. This will trigger a cutscene. The creature starts to rise up behind Aya, but Rupert comes in and blasts it. Aya and Rupert discuss the unusual nature of this ANMC, and another ANMC will rise from behind the counter. Rupert shoots it, too. He says they need bigger guns, and sends Aya to call for backup. (If you check the map, you can see that the cafeteria is still red.) | 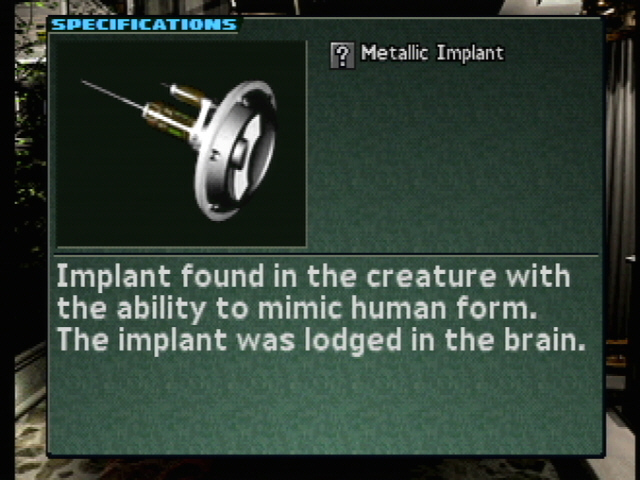 |
| Head
back toward the square. Two Grin Strangers will jump off
the
roof and attack Aya. If you can get them close together, you can
hit both
at once. Pyrokinesis may be a good idea here. They will
drop a Pepper
Spray. Go back up the stairs and use the phone. When
you talk
to |
|
 |
Reload from the ammo box, which holds an unlimited supply, and go back down the stairs. You will hear noises. Check the map, and you'll see that the area is hot again. There are three Moths and three Rats on the patio. These can usually be killed with one hit, but keep your distance. Reenter the cafeteria. There is an Odd Stranger behind the counter which needs to be eliminated. The door in the back corner is partly open. Go through it into a hallway, and fight the eight Rats you find there. Enter the kitchen (the first door on the left), and search the body for a Recovery1. If you didn't get the Odd Stranger up front, it should be here trying to finish off the SWAT member. Look in the refrigerator and get the Stim. Go back into the hall. |
| There is a yellow box on the wall containing a Blue Key that you will need. At the end of the hall, open the door on the left. Read the bulletin board and copy down the musical notes on the piece of paper marked "bridge." Also notice the picture beside the music memo. This is a clue for a later puzzle. |  |
 |
Go to the desk at the end of the room and access the security cameras. Use the directional buttons to move the arrow on the screen - it will turn red when it can be pushed. Use the + button to raise the lighting, and the - button to lower it. Currently the camera is set to the west elevator hall. The second button will set it to the Coke machine in the east elevator hall. (Notice that the SWAT member who gave you the Cafeteria Key is no longer there.) When you press the third button, you will see Rupert walking across an area you haven't seen yet. The fourth button shows a SWAT member doing something behind a statue in an enclosed circular area. The fifth button shows the catwalk and the lights of LA, and the 6th shows the Observatory. |
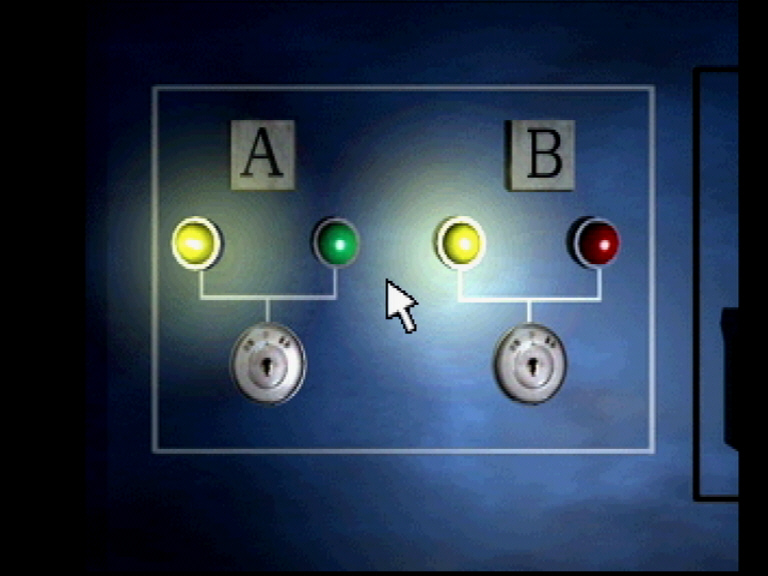
| Now examine the blinking
light in the panel on the wall. There
are two
locks, each with two lights. They're marked A and B. |
 |
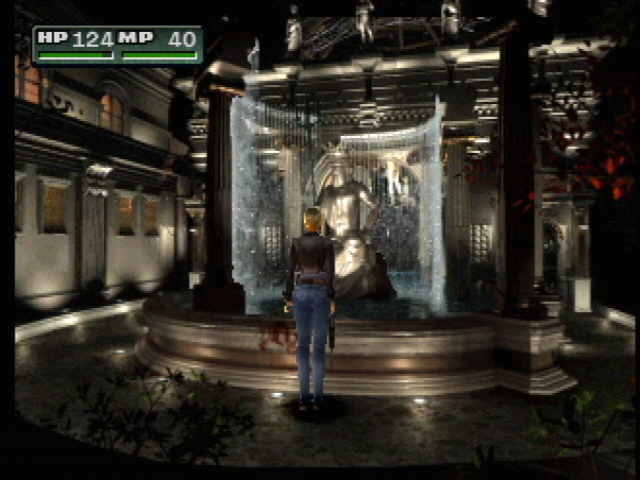 |
Search the trash can outside the door for a ? Bottle, which you can identify as an MP Boost2. Stand in front of the bloody spot on the fountain. Examine it several times - you will learn that there is an item there, but you can't get it yet. Take the hard-to-find path beside the tree with red leaves. Search the ammo case on the ground, and get a ? Capsule. It is a Protein Capsule, which you need to attach to your armor. It refills your health completely and permanently adds five points to your max HP, so save this until you really need it. |
| Leave
the path and continue toward the back of the fountain. Go through
the
door into the |
|
| Search the body on the bench near the second escalator rail to get a Tactical Vest (it will need to be identified in inventory). Nice! It gives you HP + 50, MP + 10, seven attachment slots, quick fire, and HP recovery. Too bad you have to turn in all the equipment you find here after the mission is over. But you can use it for now, so equip it ASAP, and fill up those attachment slots. |  |
| Continue
across the Observatory and take the other escalator down into
a new area - the Promenade. There are two Brutes here, and
positioning
is important with these monsters. They are slow and don't seem
terribly
bright, but they can put the hurt on you if they get close enough to
get in a
good whack. They have a very long reach. Try to keep them
at a
distance, but just within range of your weapon. They will drop a Recovery1.
|
|
| NOTE: My inventory is full at this point. If an item is dropped in battle and you have no space for it, you will have to exchange it with something currently in inventory, use something to make a space for it, or forfeit the item. You can use items from the Battle Field inventory that have not yet been transferred to Player Item inventory, so if you could use some healing and don't have room in inventory for the Recovery1, you can use it directly without transferring it. It is important to keep some space in inventory, though. You don't want to get into battle and be forced to choose between two items you really want after the battle ends. | |
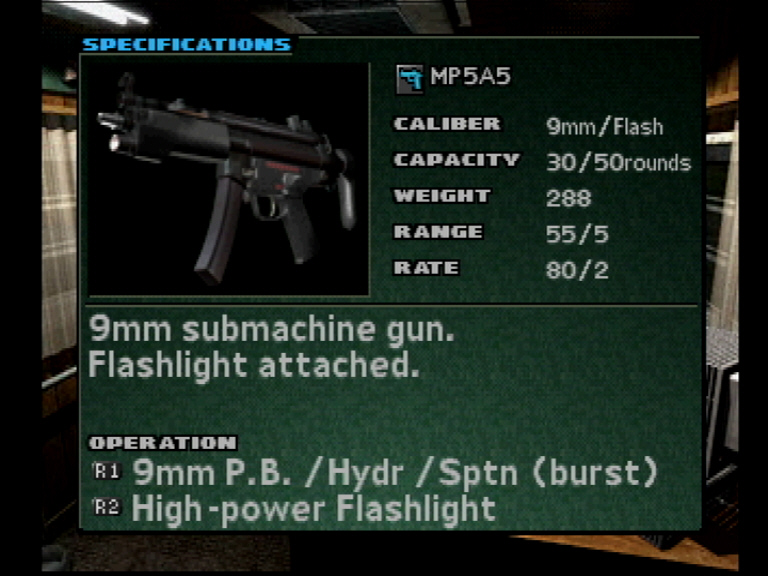 |
You will hear gunshots in the Sanctuary, but first, go past the Sanctuary doors and examine the SWAT body at the end of the area. Pick up his MP5A5 submachine gun and equip it. Press R1 to shoot and R2 to use the flashlight attachment. It has a lower rate of fire, but better range, and it uses the 9mm P.B. rounds you already have. |
| NOTE:
You can skip cutscenes by pressing Start, but I
definitely wouldn't
recommend it. They often reveal important information. |
|
| Enter the double doors to the Sanctuary, and see Rupert being attacked. When Aya enters, the attacker jumps through the stained glass window. There is a cutscene in which Aya tells Rupert there is no backup coming, and he tells her to go after his attacker. Look in the aisle, and pick up the Red Key dropped by the cyborg soldier, known as No. 9, before he escaped. Walk to the front of the Sanctuary and examine the pulpit to read some interesting quotes. Walk to the back left of the Sanctuary, and walk through the side door there. Aya will overhear a suspicious conversation. What do you know - it's the SWAT member you saw through the security camera. | 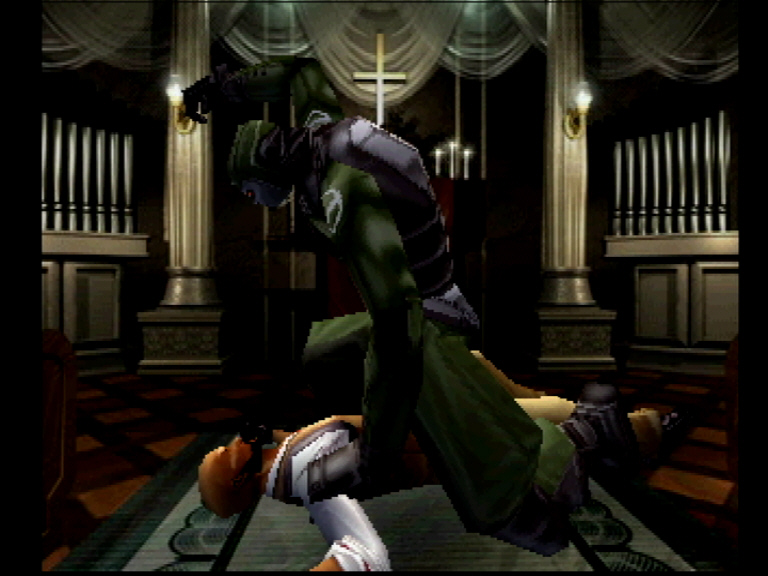 |
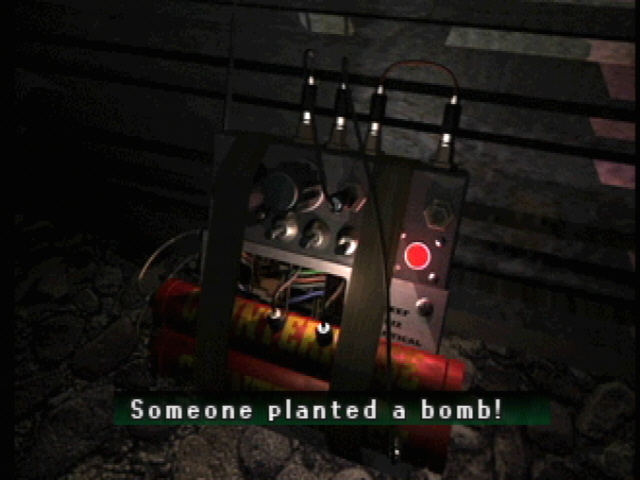 |
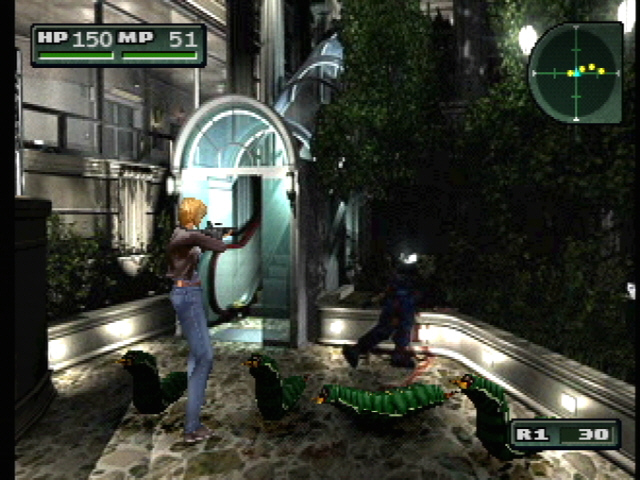
Continue across the Roof Garden and into the circular area that you saw through the security camera. Look behind the statue, and examine the blinking light. Apparently what you witnessed earlier was the man planting a bomb. The door behind the statue is locked. Examine it twice to find the Black Card the SWAT member dropped. Look at the map, and you will see that most of the areas you've crossed are repopulated with enemies. As you walk back across the Roof Garden, you will be attacked by four Caterpillars, which drop an MP Boost1. |
| Return to the Sanctuary to find that Rupert is gone again. Go back out on the Promenade and defeat four Rats and three Moths. Go back to the escalator and up to the Observatory. Stay behind the rail and fire at the two Brutes. (With the MP5A5, you can just hold down on the R1 button for rapid fire. This is a very effective technique, but it eats up the ammo.) The Brutes drop 50 9mm Hydra rounds. They are more powerful than the P.B. rounds, so use them for stronger enemies. | |
| Go
down the opposite escalator and back into the |
|
PART 3: A NARROW ESCAPE
| Go down the left stairs to the Patio. Defeat the two Lesser Strangers and two Moths, for which you will receive 50 9mm Hydra rounds. Enter the Cafeteria and take out the two Odd Strangers. Go through the back door into the hallway and get rid of the four Rats and the Odd Stranger waiting there. Enter the Security Room and go back to the key panel. The power is off on the security cameras. This time, use the Red Key on Slot B, which will drain the fountain. | 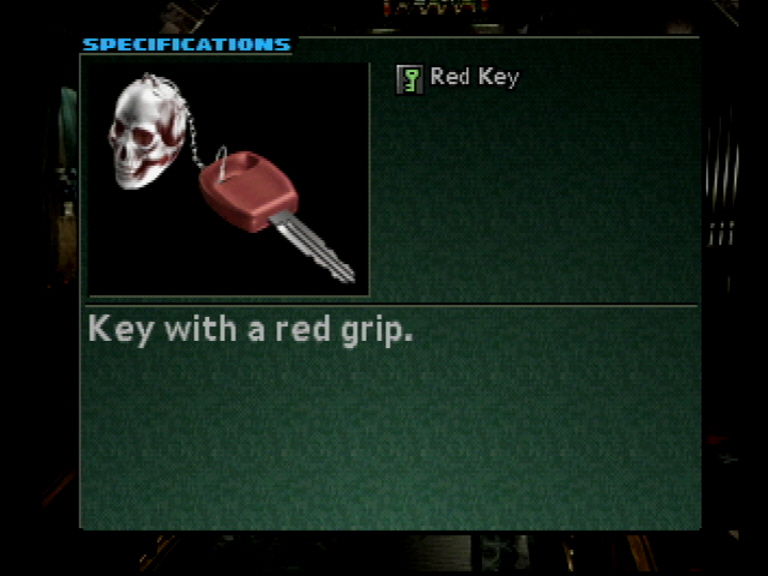 |
 |
Go through the door to the
Fountain area, which is hot again, and fight
two Brutes, which drop 4 40mm Grenades. Pyrokinesis will
make
short work
of them. Stand in front of the fountain and examine it
again. There
is a SWAT member in the fountain. Get his Grenade Pistol.
Walk into the |
| At this point, I would go back up and reload on ammo since it is convenient to get to right now. Then go up the escalator to the Observatory. You will get an overhead camera view, and then be attacked by nine Bats. Be careful of Bats! They are weak and easily killed, but they get in Aya's face, causing her to ward them off with her arm, which means she can't get a shot off. Meanwhile, they're draining her HP. Try to stay back and dispose of them in groups - Plasma is really good for this. You will receive 50 9mm Hydra rounds after the battle. |  |
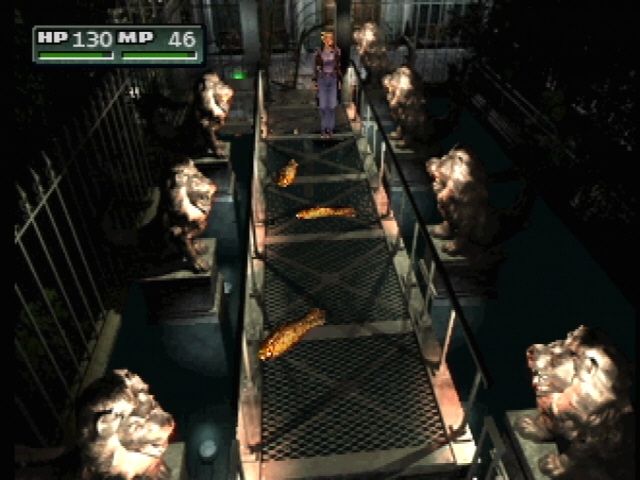 |
Go down the opposite escalator to the Promenade, and fight off the four Caterpillars and six Moths. Go back through the Sanctuary to the Roof Garden and take out the four Caterpillars and three Moths. Go back to the Promenade and stand in front of the gate across from the Sanctuary doors. Open the gate, but don't try to cross the bridge. Walk over to the red light and examine the panel...did you write down the musical notes from the bulletin board? You'll need them now. The numbered notes are the key - if those notes are 1, 2, and 3, then using that numbering system (line, space, line), the notes with question marks would be 5, 6, and 1. Enter those numbers in order on the keypad by the bridge. This will raise the bridge. |
| You now have a green light instead of a red one. Get rid of the three Bass and cross the bridge. Listen to the scary noises coming from the other side of the door, then finish off the Lesser Stranger that got thrown against the door, after which you will get a Recovery2. Examine the flashing red light on the wall - it's another armed bomb. Go down the hall and up the stairs. | 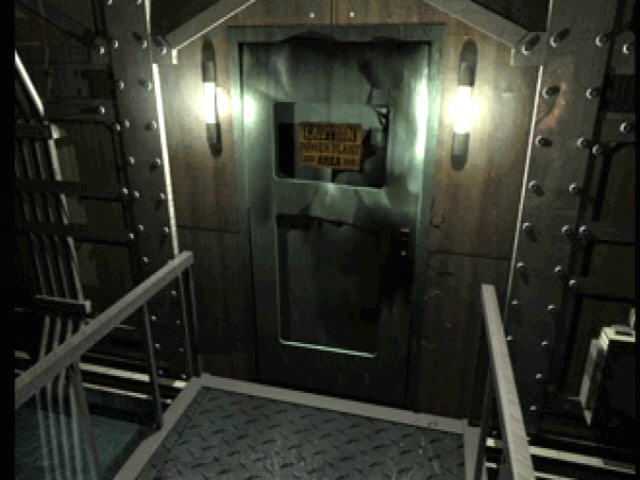 |
| Now you need to prepare for a boss battle. Take off the GPS, because it is less important right now. Make sure you're wearing the Tactical Vest, and, if possible, have the following attached: MP5A5 and ammo, Grenade Pistol and grenades, Protein Capsule, and HP and MP recovery items. If you have the EXP points available and have not already done so, reactivate the Healing and Metabolism PE powers. Use the emergency phone on the wall to call Baldwin, who is about as helpful as usual. Save the game, and head up the stairs to the Heliport. | |
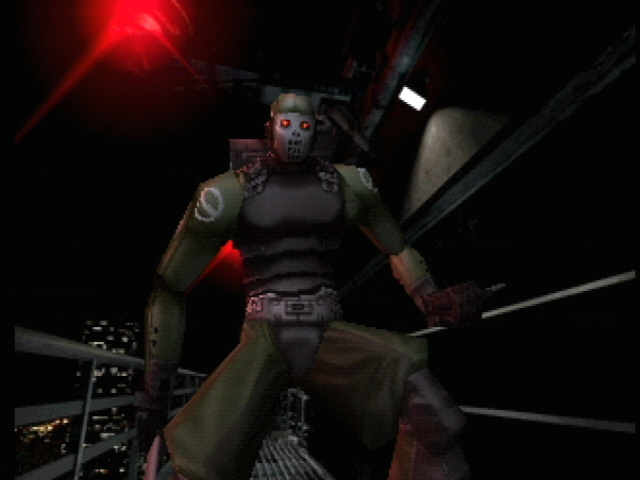 |
Walk around the catwalk all the way to the other end. The lift is on the top floor, so you can't go up yet. Go back toward the stairs you took to come up here, and notice the electric cables on the wall as you go. You will have to make use of those in the upcoming boss fight. When you get back almost to the stairs, someone jumps in front of you. It's the weirdo from the Sanctuary...No. 9. (Do you remember that the man setting the bomb said No. 9 would create a diversion? Prepare to be diverted.) He has a smart mouth, an irritating laugh, and a flaming sword. After a brief conversation, turn and run back toward the elevator, but stop just past the first set of cables on the wall. When No. 9 has almost reached them, target the cables and fire. One should swing loose and hit No. 9, doing a whopping amount of damage. Then run past the next set of cables and do it again. |
| Don't let him catch you if you can avoid it. He will use a bomb to paralyze you, then whack you with the flaming sword, which is as painful as it sounds. When he shoots a paralysis bomb at you, move so that it will miss. Just in case, though, it is a good idea to keep using Metabolism. Do the cable trick one more time by the elevator, then target the steam pipe (next to the cable) and shoot at it. It should do several hundred points of damage. Equip the Grenade Pistol and load a grenade. Shoot the grenades at No. 9, and if that doesn't do it, try a little Pyrokinesis or some rounds from the MP5A5, as a last resort. After the battle, he'll jump up to the Heliport. | |
| Take the lift up. Aya confronts No. 9, but he makes a running jump to the next building. Rupert runs up holding the bomb detonator, which he found lying on the ground. He doesn't know how to defuse the bomb, either. Fortunately, the helicopter arrives just before the building blows up, and they escape through the flame-, smoke-, and debris-filled air. | 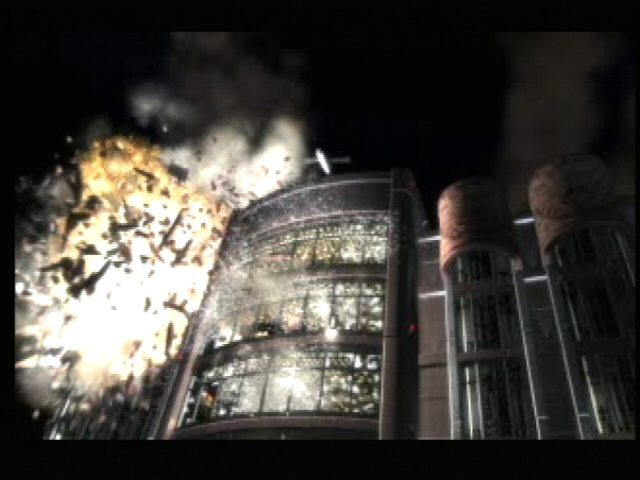 |
PART 4: AREA 51...I MEAN, 272
M.I.S.T. Center, |
|
 |
Aya and
Rupert meet with |
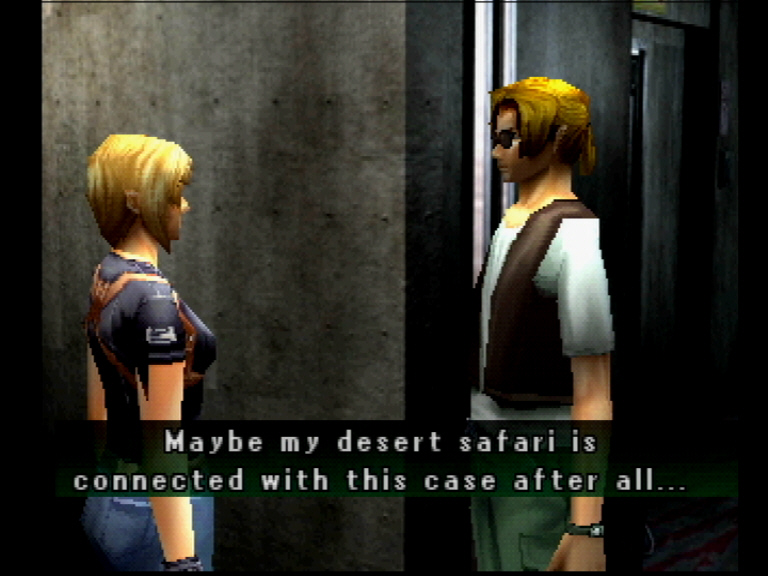
| After a brief scene, you see Aya
digging
in her trunk as Pierce walks up. He analyzed the Metallic Implant
found
in the creature from the Cafeteria, and found it to be a
state-of-the-art
micro-transmitter, with sand in it from the |
 |
 |
Instead of leaving right away, head back into the building and visit Jodie. At this point, I could afford the PA3 shotgun, some Buckshot, and the Turtle Vest, or the Combat Armor, or the M4A1 assault rifle. The M4A1 is a nice weapon with a great range, but I don't recommend it at this point, because it's easier to find shotgun ammo in the desert than it is to find rifle rounds. The Combat Armor is great, with a 40 HP bonus, 10 MP bonus, 5 attachments, and silence resistance. It also has a built-in motion detector, which would eliminate the need for the GPS and free up an attachment slot. Decide what is important to you, and make your purchases accordingly. |
| (I took
the Combat Armor, because I couldn't pass up
those
bonuses, and you will meet a man in the desert who will "sell" you
new weapons.) Go back to the garage and use the phone. Talk
to the
lovable |
|
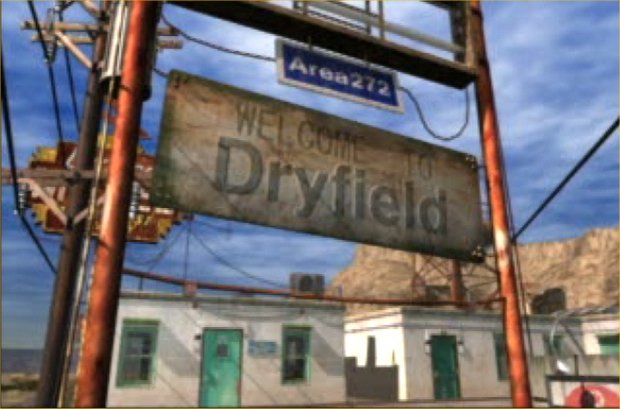
| Ah, Dryfield....what a lovely
spot. Refill your 9mm P.B.
rounds
from the ammo box beside the car, then use the expensive pay phone in
front of the
gas
station. |
 |
 |
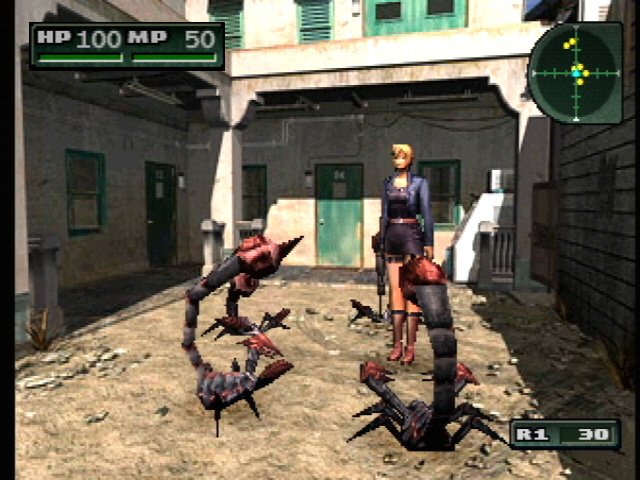
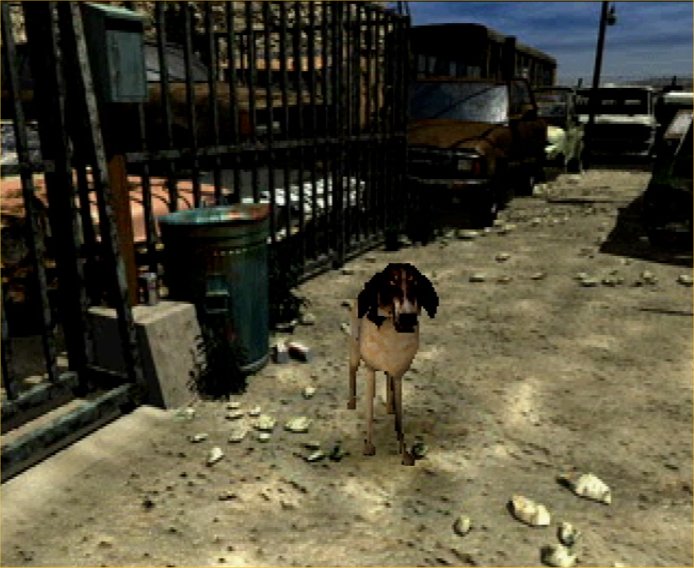
A creature jumps down from the building ahead and to the right. It's a Desert Chaser, and you'll get to be very familiar with this type of ANMC. It is fast, and loves to headbutt. It can knock Aya down, so try to keep it at a distance. However, it's not too bright, and if you stand in front of a wall and dodge at the last second while it's charging, it will run into the wall. (Kind of like Bugs Bunny and that bull...) You can also use Pyrokinesis to knock it down, and then pound on it while it's off its feet. Don't be afraid to use your PE if you need it. Defeat the Desert Chaser and get 50 9mm Hydra rounds. |
| Open the door to Room 1 and examine the picture on the wall. "Doc Holliday, 1851-1887." You will need to write this down, and do the same for other pictures you find. Continue to Room 2, bypassing the iron gates to the Parking Area for the moment. You are not alone in Room 2. A couple of Odd Strangers are waiting for you to put them out of their misery - do so without hesitation. Afterwards, examine the next picture. "Wyatt Earp, 1848-1929." Go down the little hall to the closet and search it a couple of times for the Penicillin, then go into the bathroom and get a Recovery1 out of the garbage can. | 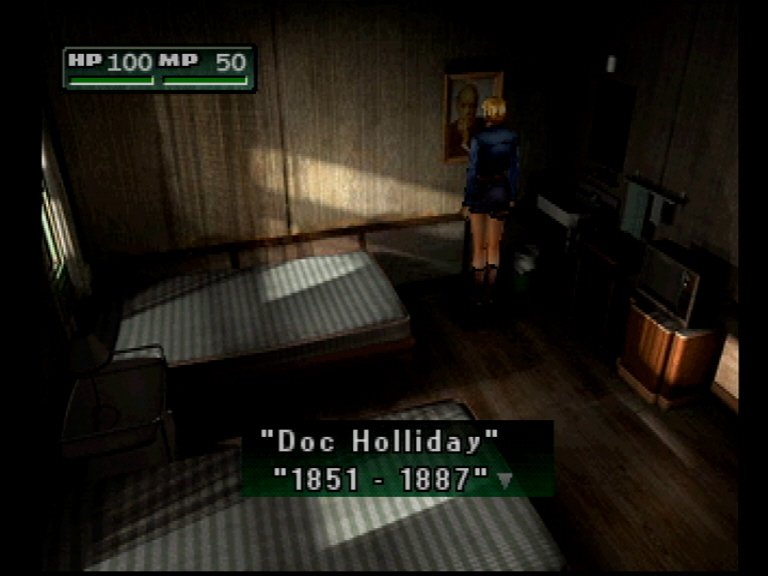 |
| You can try Rooms 3 and 4, but they are locked. Near the ice machine, there is a little gate between two buildings. Go through it and walk to the end of the area. There is a Recovery1 in a wooden box near the fence. Examine the well and fight 25 Bats (yep, I said 25), and get a Combat Light. Enter the door to Douglas Scrapyards. You can't make your way through the building yet - you'll have to solve a puzzle first. | |
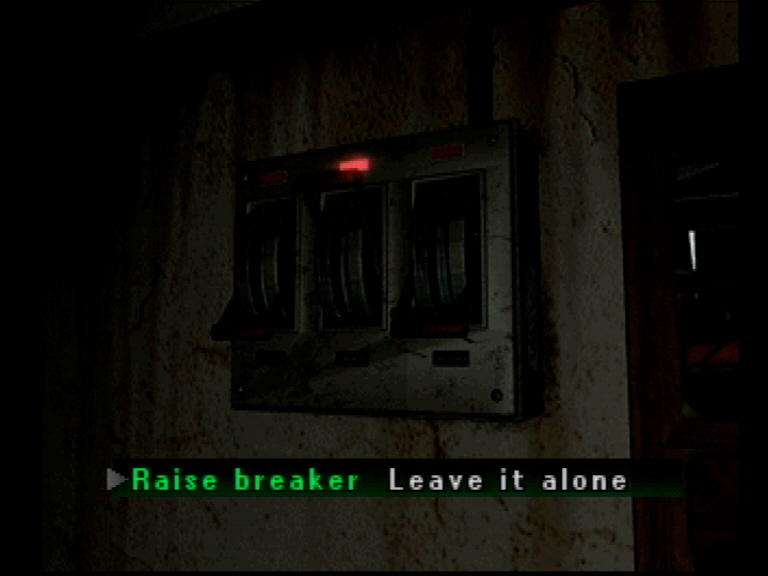 |
Go through the door in the metal fencing and walk around the car. You will hear a noise on the other side of the wall. Examine the panel with the red light, and raise the breaker. Walk to the control panel with the yellow light (it's across from the door you used to enter the building) and press Up, then press Turn. The car has now been lifted and rotated, so you can get by. Examine the red light on the wall beside the large metal door in front of the car, and press the button, which turns the light green. Now go to the side and unlock the door in the fence. |
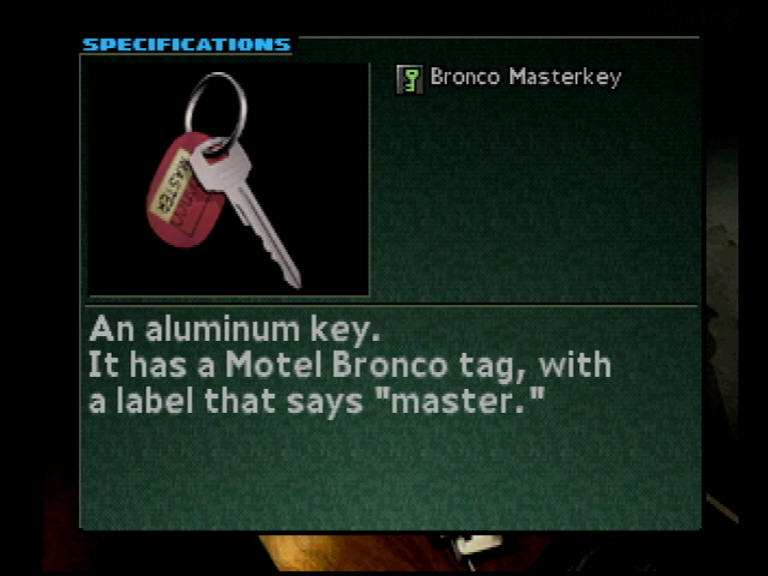
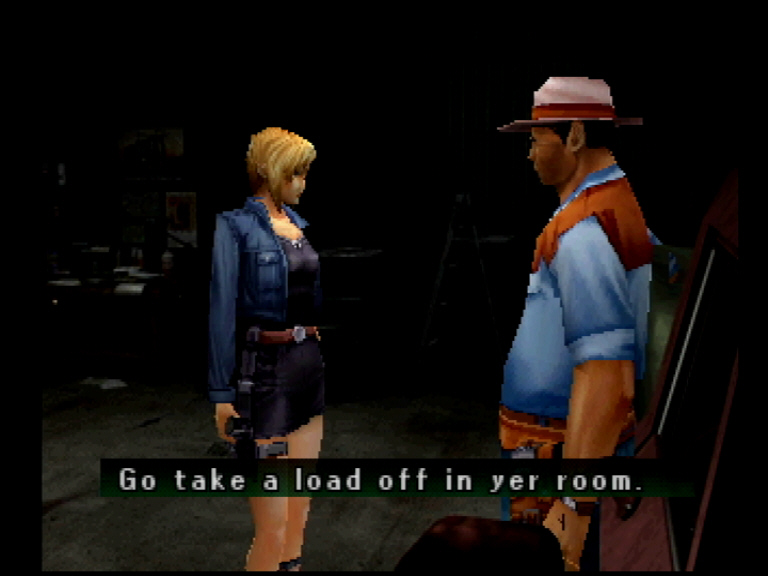
| Go back to the control panel in the first room, and press Turn, then press Down. The car is now back where it started. Enter the second room and open the large metal door, and you will meet Gary Douglas, who doesn't appear to like intruders. After a brief conversation carried on while he holds a gun on Aya, Gary decides she's not a mutated creature and might be okay after all. He tells her he has to go on his rounds, and he won't let her help, but suggests that she rest, and gives her Motel Key No. 6. | 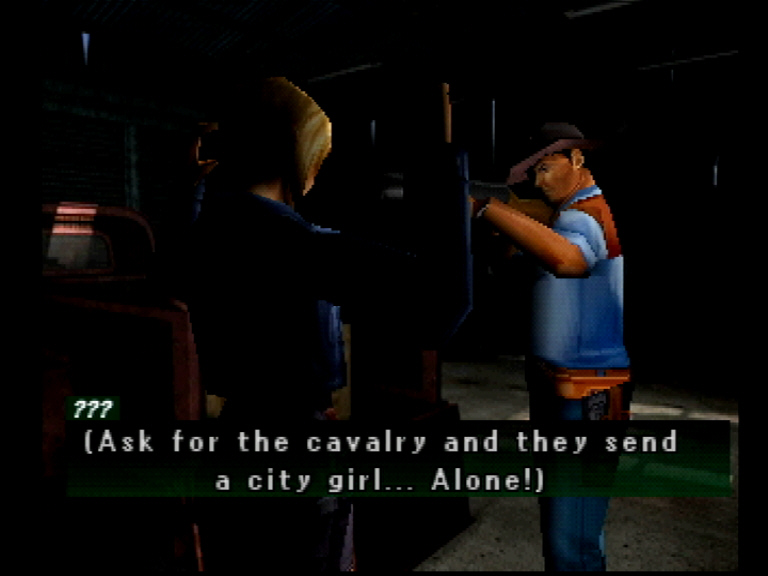 |
 |
Check the map, and you will
find that some areas are hot again.
On |
| Return to Aya's car and
restock on ammo. Then call |
 |
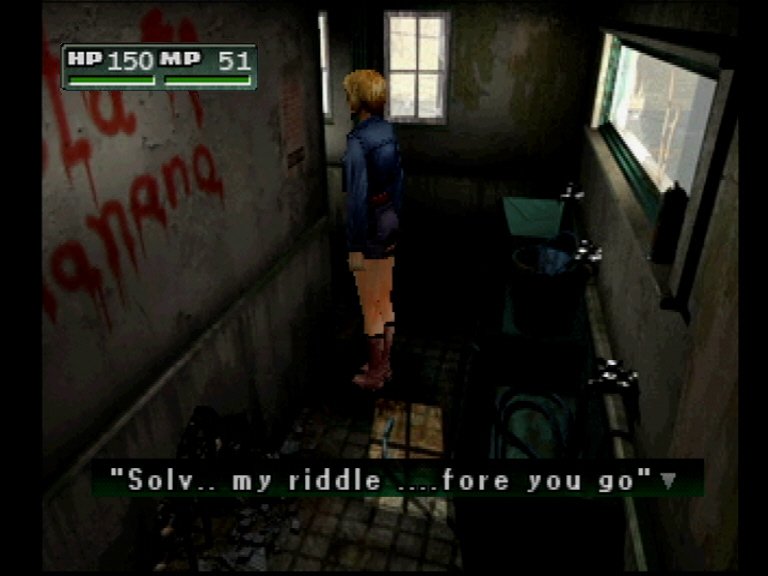 |
There's a message on the wall in faint, red ink. It's the first of several you'll find in Dryfield. Letters are missing, but you should still be able to determine that what is says is this: |
| Solve
my riddle before you go How many phones in Dryfield's streets? Then proceed, go down below To sunless mole hills where red blood sleeps. |
|
| There's nothing else to do here, so go back out into the Parking Area and up the stairs to the second floor balcony. At the top of the stairs, look at the map to see that the area is hot. If you press the triangle button while looking at the map, it will give you clues about your next destination, and a flashing red light shows you where you need to go - Room 6. Get the three Odd Strangers on the Balcony, then use the key to open Room 6 (you can't get into the other rooms yet). | 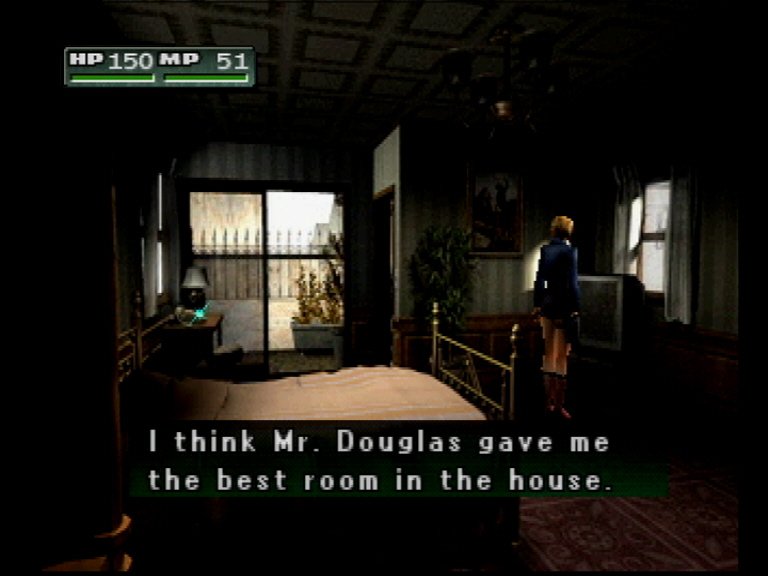 |
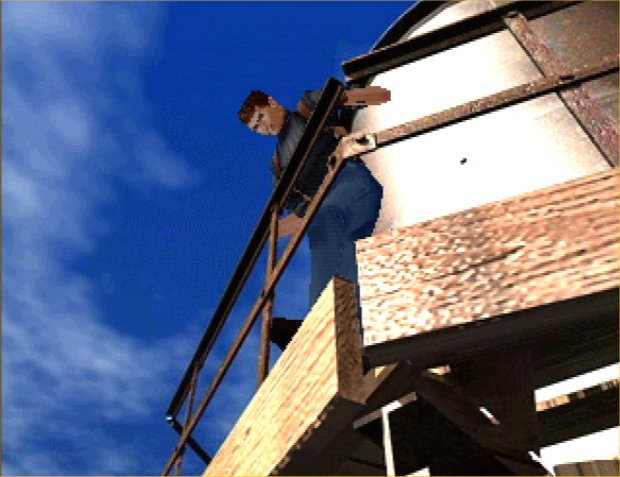 |
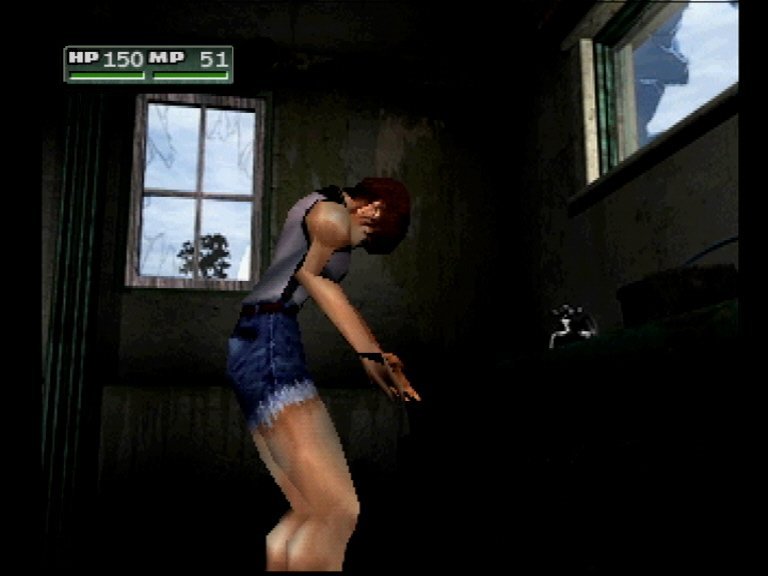
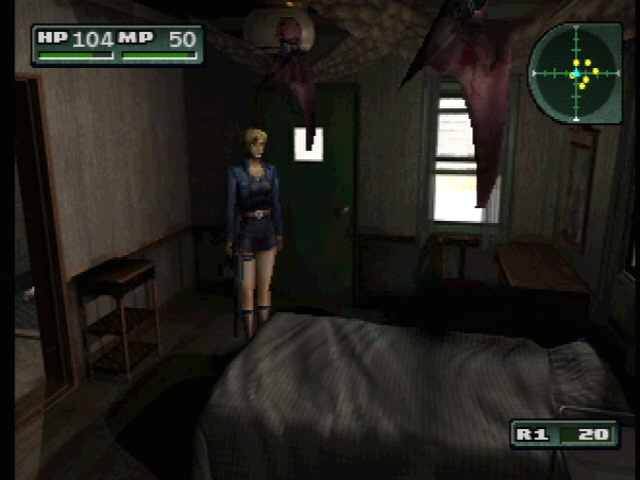
Look at the small cabinet near the door, and take the Stims and the 9mm P.B. rounds. You can also store things here, if you like, but I rarely do, because this room will be much harder to access later on. (If you've played Parasite Eve, have Aya look at the TV, because she'll have something interesting to say about an old friend.) This room is much different from the ones downstairs. Go into the bathroom and look in the mirror, and Aya will have several comments to make. Pick up the phone and save the game, then walk onto the balcony. Aya sees a water tower, but who is that up there? Climb down the ladder. |
PART 6: MADIGAN, P.I.
| It's a little difficult to get to the lever that opens the gate in the fence around the water tower. The first thing to do is get rid of two Desert Chasers digging a hole under the fence. Try to shoot them through the fence, and use PE when needed. Walk past the hole to the opening in the fence. Enter, and examine the box and raise the gate lever. Now run like crazy, because the gate on the other side will only stay open for a short time, and Desert Chasers will be trying to knock you down as you run. |  |
 |
Once inside the gate, which will shut behind you, take out the other six Desert Chasers, which keep coming through the hole under the fence (all of them together give you 400 wonderful BP), and get a Recovery2 for your trouble. After you defeat them, the mystery person will lower a ladder, allowing Aya to climb up the water tower. Walk around to the other side, and say hello to Kyle. He says he's a P.I., but he knows more than he ought to. He mentions a shelter which Aya didn't know about. Aya doesn't completely trust him yet, even though she does find him appealing. She agrees to join forces. |
| Aya can see the whole town from here. Walk to where Kyle was standing to get the view. Examine the lever on the tower, and raise it to open the gate, which will stay open this time. Climb up the next ladder to the top of the tower. Examine the corpse to get the ? Key and a Recovery1. If you examine the ? Key, which is a Key Item (no, really!), you will see that it says G & R. Go all the way back down, where you will be attacked by five Scorpions. These guys are tough - they surround Aya and keep striking her, which will prevent her using PE. |  |
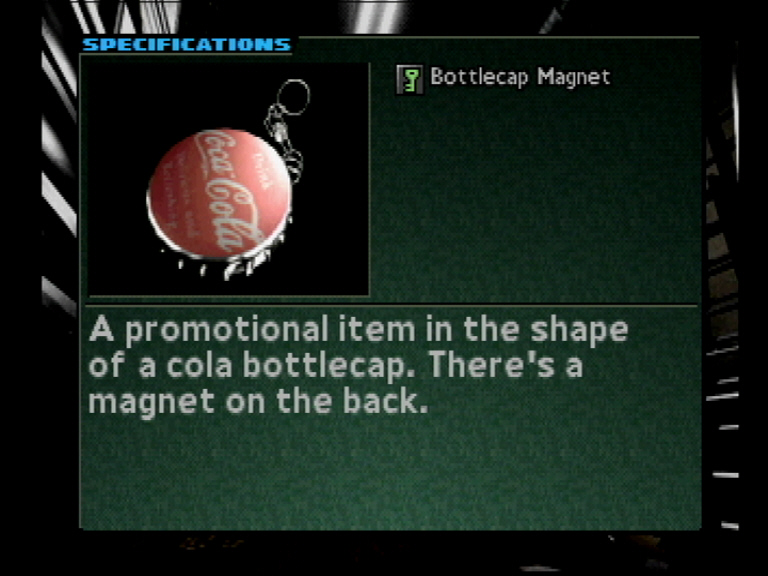 |
You will need to talk to Mr. Douglas now about the shelter. Leave the fenced area and check your map. Several areas are hot again, and there is a red light blinking to show your destination. Don't go there yet, though, because you can't get in. It's time to dispose of some more creatures and use that key you just found. It fits the back door across from the fenced area. Go through the door, destroy the three Mind Sucklers, and get a Combat Light after the battle. Get the ? Magnet off the refrigerator door and the Recovery1 out of the locker. Examine the magnet to find that it is a Bottlecap Magnet. Go through the door into the G & R Saloon. As you advance into the room, you'll have to fight five Mind Sucklers. Step into the restroom and look at the wall. You will find a map of Dryfield, which Aya will enter into her GPS. |
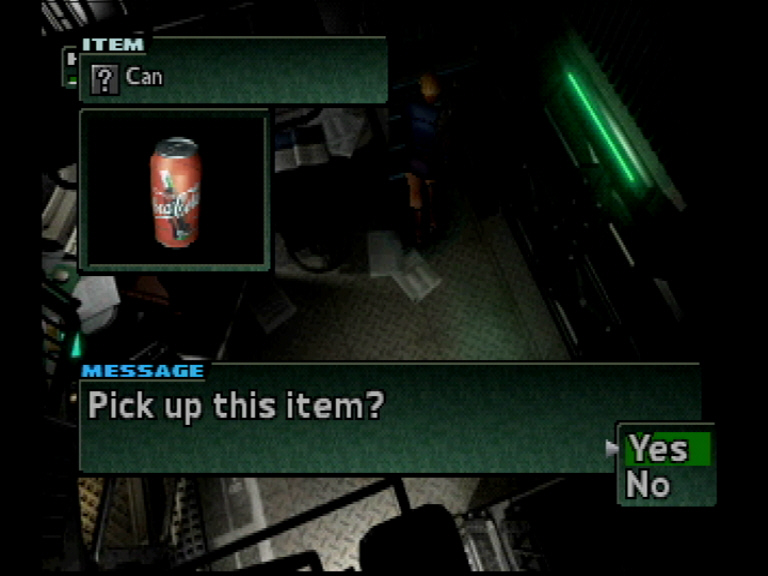
| Walk
toward the front door and look in the cooler beside it for a ?
Can,
which can be identified as a Cola. This great item restores 20 HP
and
80 MP,
so use it judiciously. Go out the front door, and you will see
and hear
another Desert Chaser in the parking area. After you take care of
him,
six Scorpions will surface. I would recommend using Combustion on
the
group of them. After the battle, you'll receive 50 9mm Hydra
rounds. Go upstairs toward Aya's room, and take out six more
Scorpions on
the balcony. |
|
| Enter the motel room and call
Baldwin, who wants to
investigate Kyle and learn more about the shelter. After you save
the
game, climb down the ladder and go to the gate beside the motel.
It is
opposite the gate in the water tower fence. Open it, and walk
down the
narrow path. A Desert Chaser will drop down and attack you.
Get rid
of it for an MP Boost1. Walk to the door and press the
button on
the intercom. |
 |
 |
Unlock the door and enter the
factory, then go into the garage through
the
large metal door. Dispose of the five Mind Sucklers, then go
through the
door in the corner near the truck. You are in the Junk Yard, and
will
meet |
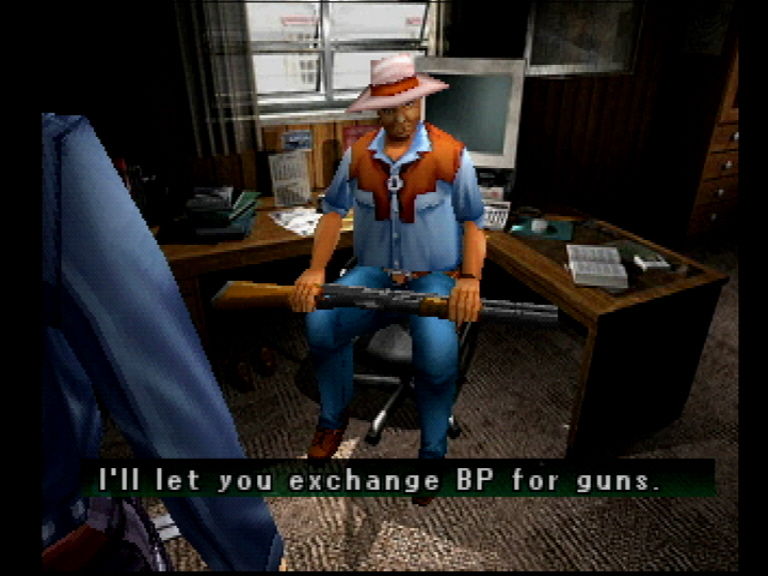
| Walk
to the far end of the Junk Yard and open the trailer door.
Go in and
talk to Gary, who just happens to have a very attractive collection of
weapons. Ask him about the shelter. While talking, you'll
hear a
scream from the Dilapidated House to the south. |
|
| Apparently MIST has contacted
|
 |
PART 7: THE REAPPEARANCE OF NO. 9
 |
After you leave the trailer,
several areas are hot again, so take
care of
them before you move on to the Dilapidated House. There are three
Mind Sucklers in the Garage which need to be eliminated. |
| Climb up to Aya's room and
save the
game.
Pierce has some intriguing news about that Metallic Implant you
found. Go
to the car and restock on ammo, then return to the well, where you left
|
 |
| Walk the other way, and get rid of the eight Bats around the corner. Continue down the passage, and open the gates to the Underpass. Walk to the back wall and press the button, then return to the Water Hole. Walk partway down the passage and examine the hole in the wall for a Protein Capsule. Then return to the Underpass. | |
 |
There is a Gray Stalker on the ceiling here. This is a strange boss. It is invisible much of the time, and it crawls back and forth across the ceiling whacking at Aya as it passes. Try to maneuver so that you avoid it as it passes by. There are times when you can't target it, so stay alert. If you are careful with your targeting, you can knock it off the ceiling with PE, and attack it when it's on the ground. It will drop a Protein Capsule and 10 R. Slug shotgun shells. Continue down the passage and open the door on the left. |
| Enter the Cellar. You will immediately have to fight eight Bats and two Rats. Walk around the corner and examine the barrel to find a message in glowing ink. (This is why I told you to come in here with the lights off. Otherwise, the message wouldn't be readable.) The message is this: | |
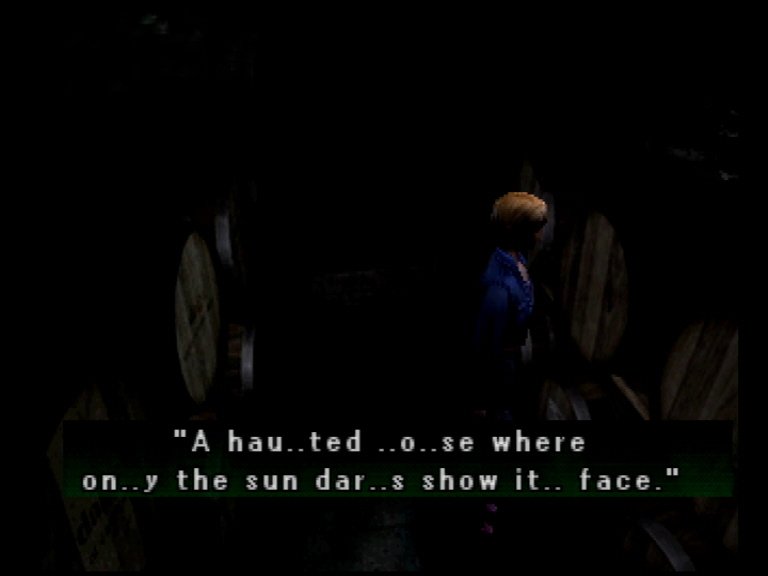
| Now
solve my riddle two, How many urinals in Dryfield's loo? Once you know, to the next place, A haunted house where only the sun dares show its face. |
 |
| Go back out into the Underpass, and flip the switch at the end of the passage. This will turn on the light in the Cellar. Go back to the aisle where you found the message, and look in the box at the end for a Flare. Now you are ready to go up the ladder in the Underpass. You will emerge in a hall behind the General Store. Walk into the store and take out the five Blood Sucklers, which drop a Flare. You can find a Cola and a Recovery3 in the refrigerated case on the side of the store. Unlock the front door and go back to the car to restock on ammo and store items which are temporarily unnecessary. Save the game and reenter the store. | |
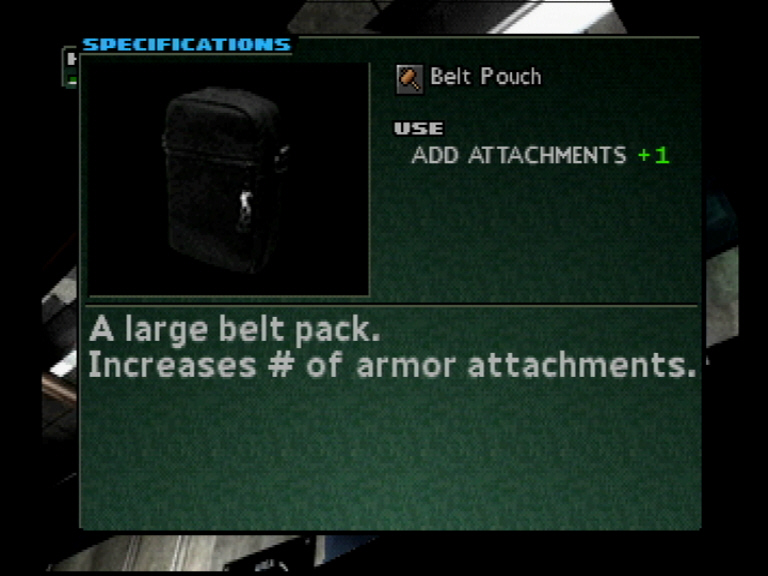 |
Go through the door in the right rear corner and you will be in the Back Street. Take care of the two Desert Chasers, then go into the first room of the house. There are two Blood Sucklers and a Mind Suckler in here. If you look out the window, Aya will make a remark. Search the cash register twice for a Belt Pouch. Look at the picture on the wall nearby. "Sitting Bull, 1831-1890." In the second room, Aya finds a wardrobe bolted to the wall, and for some reason there are scratch marks beside it. Aya finds herself wishing she could remove those bolts... |
| The
final door is locked, but Aya has identified that room as the
location of
the screamer. Apparently you'll have to move that wardrobe to get
into
the third room. Search one of the barrels at the end of the Back
Street
for 10 Firefly shotgun shells. You need to talk to |
|
| Time to use that Monkey Wrench on the Wardrobe. Access it from the Key Items menu. Aya will move the wardrobe to uncover a hole in the wall. Go through it, and search the end of the short hallway for another verse. This is scrawled in the dust: | |
| Solve
my riddle before you go, How many barrels in the mole-dens' center row? Once you know, go to top room, Where at 21 years a boy met his doom. Where you CAN see yourself. |
 |
| That must be a reference to Billy the Kid, who, according to legend, was shot at age 21 by Pat Garrett. | |
 |
Heal and check your attachments, because it's time for another boss. Enter the last room, and you will see the woman who was screaming. Woman? Um, okay, maybe not. But look who's here! It's your old buddy, No. 9. After making a few confusing statements, he comes after Aya. He's not all that hard to beat this time. I just ran back and forth from one corner of the room to the opposite one, shooting at him and using PE on occasion. There is a baffling cutscene showing a little girl (who looks like Aya) in a strange facility. This is followed by a movie, and then another cutscene. (Notice the music from the original Parasite Eve?) Aya and Kyle decide they need to check out the shelter. Kyle is temporarily part of your party, so take care of him, as he only has 100 HP. |
 |
 |
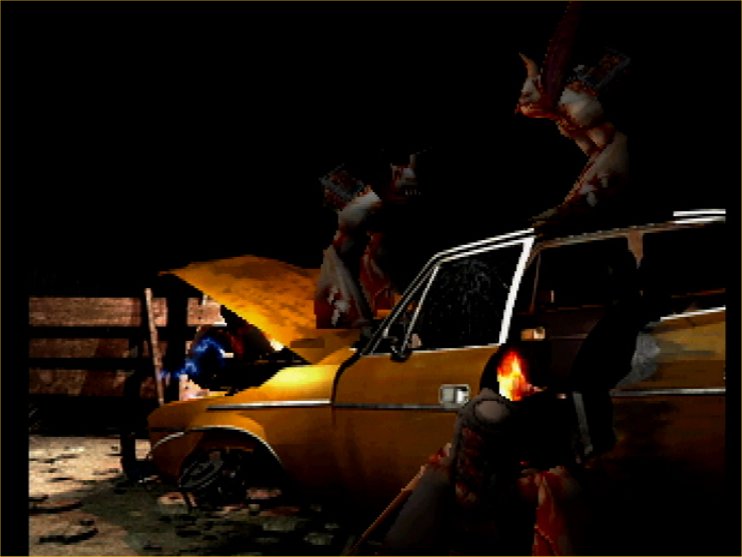
| It is now night, and most of the town is reinfested. Dryfield is really bad about that, as you have probably noticed. Go ahead and unlock this room's door to the outside, to save time later. Go out front and take out the six Scorpions. There are two more Scorpions in the middle room, and four Moths in the first one. On the way through the store, take care of the four Moths. Walk out the front door to find Aya's car being trashed by 12 Scavengers. (Remember the movie "Gremlins?" That’s what these little guys look like.) Take them out and get the Recovery2. | |
PART 8: DRYFIELD IN THE DARK
| Well, the car is destroyed
and the phone line in front of the store
has
been cut. Things aren't looking too good. Now the only
person
in
Dryfield with a vehicle is Gary Douglas. So Aya has two
things to do - talk to |
 |
|
|
Desert
Chaser, 6 Moths |
|
|
Room 1 |
2 Blood
Sucklers, 3 Scavengers |
|
|
Room 2 |
6 Blood
Sucklers |
|
|
Motel Balcony |
5 Scavengers |
|
|
Water Tower |
3 Scavengers,
6
Moths |
|
|
Breezeway |
12 Bats |
|
|
G & R
Kitchen |
5 Rats, 2
Scavengers |
|
|
G & R |
2 Blood
Sucklers |
MP Boost2 |
|
Restroom |
6 Blood
Sucklers |
Recovery2 |
|
Parking Area |
4 Scavengers |
Combat
Light |
|
Driveway |
13 Bats |
|
|
Water Hole |
Zebra Stalker |
10 Firefly |
|
Underpass |
5 Scavengers |
|
|
Cellar |
5 Scavengers |
|
 |
Head
back to see |
| There are three Zebra
Stalkers in the Garage which need to be dealt
with. Go back through the Parking Area and unlock the door to the
Motel
Lobby. Look at the picture on the wall - " |
 |
| As usual after a pivotal game event, parts of Dryfield are reinfested. Go ahead and clean up the town again before proceeding. Room 3 is home to an Odd Stranger and four Blood Sucklers. Search the shelves till you find an MP Boost2, and look at the picture: "Kit Carson, 1809-1868." Unlock Room 4 to find two Odd Strangers. There's another picture in this room - "Billy the Kid, 1859-1881." Remember the message in the dust outside the room where you fought No. 9? This is the room in the clue. Check the bathroom mirror till you find the last verse: | |
| Solve
my riddle if you dare, Organs of sense under bristly hair, Seen with how many silver plates in the Bronco's lair? Once you know, go from there To a jet-black door 'neath the moon's cold glare. |
|
| There are two Zebra Stalkers near the gas pumps, but Kyle is no longer there. You'll find three Scavengers in the General Store, and two Desert Chasers and five Moths in the Back Street. Four Scavengers and two Blood Sucklers wait in the last room of the Dilapidated House. Back at the motel, head upstairs and eliminate the two Zebra Stalkers on the balcony. Unlock the door to Room 5 and get rid of the two Odd Strangers and three Moths here. Look at the picture of "Calamity Jane, 1852-1903." Search the shelves repeatedly to find a Belt Pouch. | |
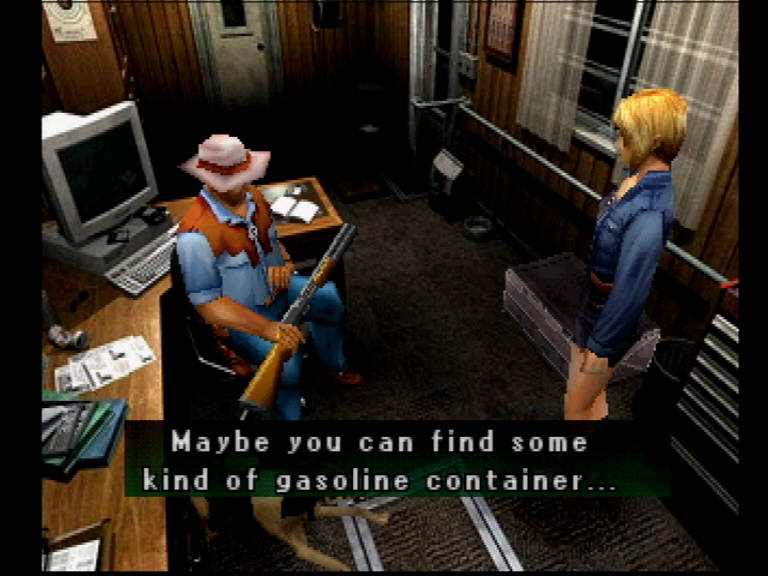
| Unlock the door at the far end of the motel's second floor. This is the Loft. Notice the creepy shadows? Go to the back of the room and pick up the Jerry Can. Three Zebra Stalkers will come crashing through the skylight, and will leave behind a Recovery3. Look at the safe in the back corner with the "jet-black door." So this is what all the clues were for - a safe combination. Here are the answers: | Question
1: Four phones Question 2: Four urinals Question 3: Eight barrels Question 4: Seven mirrors |
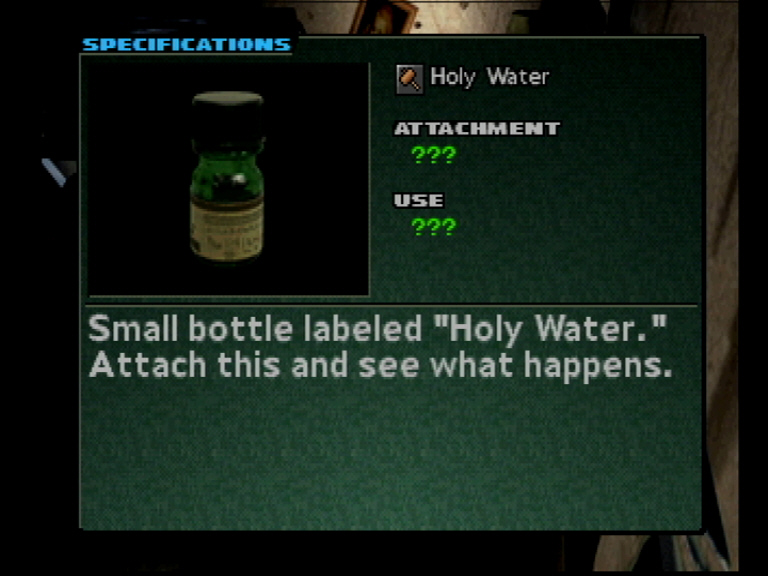 |
Enter 4487 to get a ? Bottle. You can identify it as Holy Water. If you use this item, it will level up a Water PE by one. However, if you attach it, it will reduce damage taken by 25%. It's your choice. I almost always choose to attach items like this, because you can benefit from them throughout the game. There will be other items later which will level up a PE once, or give you some kind of great benefit as long as they are attached. I will mention this again when these items are acquired. |
| Go
back to
Aya's room
and save the game. Take the Jerry Can to
the gas
station to fill it up, and it will become Gasoline in
inventory.
Go back to the Junk Yard and get rid of the three Zebra Stalkers, then
take
the gas to |
 |
|
Driveway |
12 Bats |
|
|
Underpass |
3 Brutes |
|
|
Cellar |
6 Bats, 5 Rats |
|
| Water Hole |
2 Brutes |
50 9mm Hydra |
|
Gas Station |
2 Desert
Chasers |
|
|
Dilapidated
House, Room 1 |
4 Scavengers |
|
|
Dilapidated
House, Room 2 |
6 Blood
Sucklers |
|
|
Parking Area |
2 Desert
Chasers, 4 Moths |
|
|
Restroom |
6 Rats, 5
Moths |
|
|
G & R
Kitchen |
Blood
Suckler,
2 Moths, 7 Rats |
|
|
Water Tower |
3 Zebra
Stalkers |
|
|
Breezeway |
Desert
Chaser, 11 Moths |
|
|
Loft |
Zebra
Stalker, 4 Scavengers |
|
| That should take care of the most recent creature epidemic. You will find Kyle in the G & R. Watch the cutscene, then talk to him again. | |
| NOTE: You can actually play music on the jukebox at the G & R, if you are so inclined. | |
| Now
you
can start transferring items to |
|
PART 9: AYA AND THE NIGHT VISITOR
| After Aya decides to take a nap, there will be a cutscene, a movie, and another cutscene. | |
 |
 |
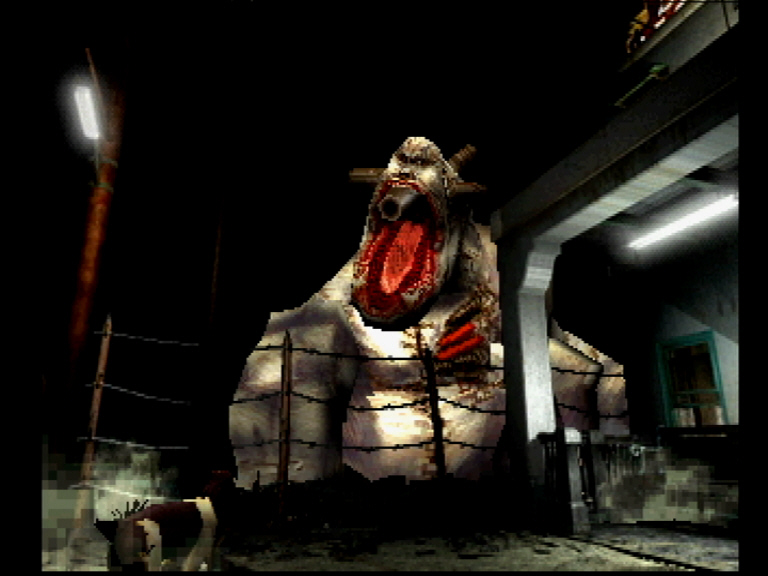
| A giant creature will come
stomping down the
street. Aya will wake up, dress, and come out on the
Balcony. Meet the Burner. He's big and he's in a bad
mood. Use the Grenade Pistol and grenades, running from one end
of the balcony to the other to avoid his flame attacks. Try very
hard not
to let
him pick Aya up, because he will squeeze the HP out of her.
Literally. It's
important to beat him as quickly as possible,
because if
the battle takes too long, he'll eventually stomp off, killing |
 |
|
Parking Area |
5 Scorpions,
Desert Chaser |
Flare |
|
G & R |
4 Scavengers,
Blood Suckler |
|
|
Loft |
7 Scavengers
(use Combustion here!) |
10 Firefly |
|
Room 5 |
5 Scavengers |
4 Riot |
|
Room 1 |
5 Scorpions,
3 Moths |
|
|
Room 2 |
4 Blood
Sucklers, 3 Scorpions |
|
|
Room 3 |
3 Blood
Sucklers, 3 Scavengers |
50 9mm Hydra |
| Room
4 |
4 Blood
Sucklers, 3
Moths |
|
|
General Store |
4 Scorpions, 4 Moths |
|
|
Back Street |
5 Mind Sucklers, Desert Chaser |
50 9mm Hydra |
|
Dilapidated
House, Room 3 |
2 Blood Sucklers, 5
Scorpions |
|
| Downstairs
near Room 1 are |
|
 |
Head back
to the trailer,
taking
care of the two Desert Chasers and two Mind Sucklers that wait in the
Junk
Yard. They will leave a Flare behind. Enter |
| NOTE:
If you didn't save |
 |
PART 10: THE ABANDONED MINE
| September
6, 2000 - |
|
 |
 |
| Watch the very disturbing movie, followed by a cutscene. Aya and Kyle will stop at what appears to be an abandoned mine outside Dryfield. Kyle is injured, and Aya must protect him. You will have to take out the Desert Chaser before it gets to Kyle, who only has 5 HP left. After the battle, Aya will convince Kyle to enter the mine. Then she will have to fight off ten more Desert Chasers. Stay away from the edge of the cliff, because if Aya gets knocked off, it's all over. Try to knock them down with Plasma, then fire at them while they're down. They will drop a Recovery3, 50 9mm Hydra rounds, and 80 5.56 Rifle rounds. Heal and load up on necessary items from the back of the truck, then follow Kyle into the mine. | |
| You will immediately
encounter five Moths and two Desert Chasers.
With
them out of the way, continue into the mine. Ignore the left fork
for the
moment, and go straight. Defeat the five Scavengers, which drop 10
Firefly shells. When you reach the gap in the track, examine
it a few
times, and then return to the place where the tunnel branched off to
the
side. Follow the side tunnel till you find a mining cart blocking
your
way. Pull the brake lever on it to get it out of your way.
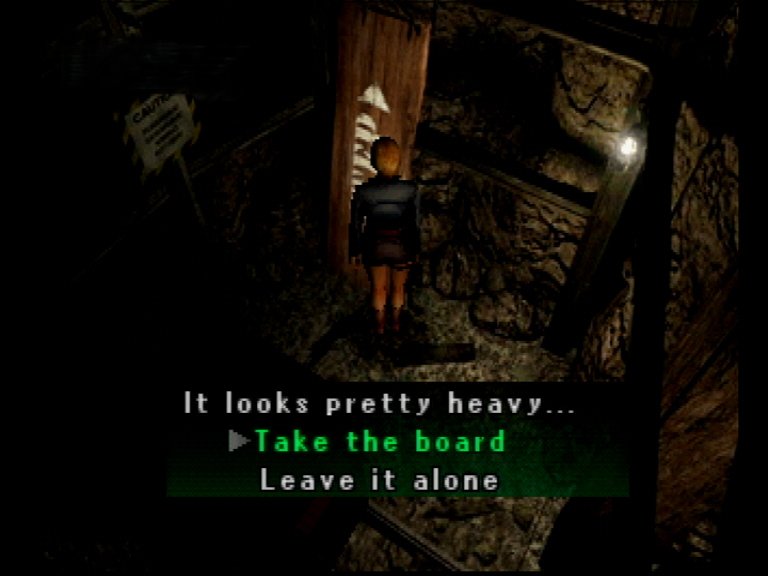
Farther
down the tunnel, pick up the ? Board leaning against the
wall.
Take the Oak Board back to the broken track and use it to bridge the
gap.
Defeat the swarm of 12 Bats, which drop an MP Boost1, and move
on. |
 |
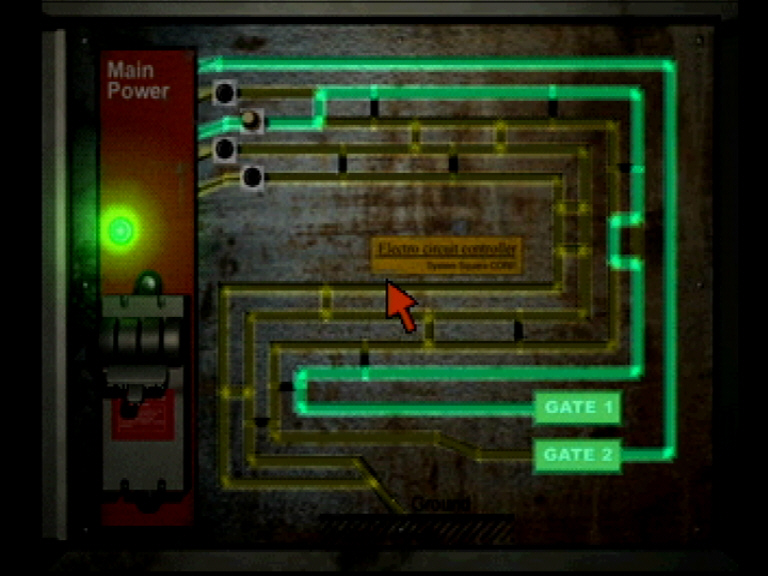 |
At the end of the bridge, enter the room to the right. You will find an ammo box (9mm P.B.) where you can stock up, and a phone. Look at the power generator at the back of the room. Take the ? Plug (Jumper Plug) from its hole on the circuit board, and put it in the second hole instead. Now lower the lever on the left. You have changed the way the power's routed, and it now goes to Gates 1 and 2. Save the game and leave the room. |
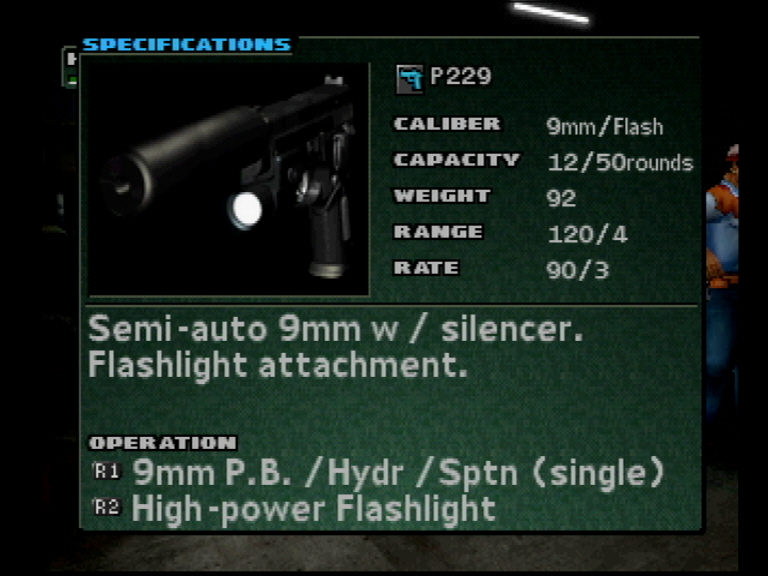
| Walk on to a new area, and you will almost immediately get in a boss battle. The first form, the Blizzard Chaser, is a breeze compared to the Chaser Zombie form which will follow. Grenades make this battle easy, though. About three should take down the Blizzard Chaser, but the Chaser Zombie will take more time. After defeating the Blizzard Chaser, pick up the Jumper Plug and the ? Handgun. Not good....that's Kyle's gun - the P229. The Chaser Zombie will run around the room in circles, jumping on you and charging at you. It can also poison you. Again, use those grenades if you've got them, but be prepared to get knocked down a few times. You don't want to stand in one place too long. | |
| One thing you can do here to damage the Chaser Zombie is to try to catch it at one of the corners where the barrels are. Shoot a barrel just as the creature gets to it, and it will explode, causing significant damage. Like using the electric cables against No. 9 on the catwalk at the Akropolis, this is a matter of timing. Have the barrel targeted before the Zombie gets to it, or you won't be able to hit it in time. | |
 |
After defeating both ANMC's, you will get a Recovery2 and 4 Grenades. Examine the crack of light in the corner of the cavern. Aya will see a motorcycle, and a switch. In the interest of BP accumulation, you should go clear out the previously explored areas of the mine, as they are hot again. Do this before returning to the Refuge (where you found the phone). |
| As you leave the Cavern, you will be greeted by 12 Bats. Continue through the Tunnel, and you'll come across three Scorpions and four Mind Sucklers. In the Tunnel Entrance are six Moths and six Scorpions. Combustion works very nicely here. Head outside the mine to find four Scavengers on the truck. Take care of them, and then make whatever inventory changes you feel are necessary. When you reenter, go back to the Forked Tunnel and get rid of the four Scavengers there. Now it's time to go back to the Refuge. | |
| Look at the panel of the Power Generator. A cable was damaged in the battle, causing a short, and the wiring is different now. Put the two Jumper Plugs in the top and bottom holes and lower the lever to send power back to Gates 1 and 2. Refill on ammo, save the game, and go back to the cavern. | 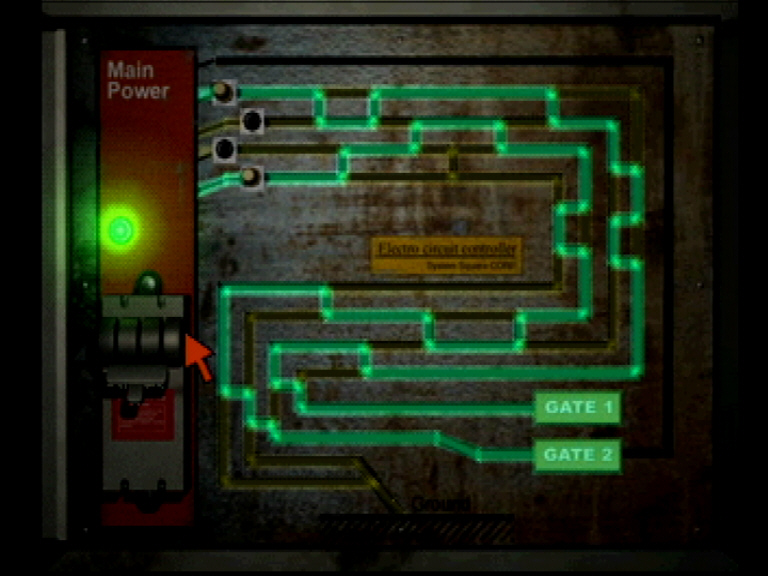 |
 |
Once there, go back to the crack of light and press the switch by the motorcycle. Then press X beside the light. Aya will enter a secret passage. As you approach the corner, you'll be ambushed by the Ivory Stalker. Run past it, and go all the way to the lighted area at the end of the tunnel. It doesn't like light, and it hangs from the ceiling, so staying in the tunnel will give it all the advantages. In the lighted room, Aya has a chance of defeating it. Equip the P229 and use the R2 button for a flash of light. This will stun the creature. You can also use Plasma, Flares, and Combat Lights. Then attack it while it's down. |
| You will probably need to use Metabolism more than once, because this creature can poison and paralyze Aya. (As an alternative, if you have some extra grenades and don't mind using them, you should only have to hit this thing four or five times with them. Don't do this unless you have several, though. There is a harder boss battle coming up, and you will need grenades then.) After defeating it, you will gain a Belt Pouch and ? 9mm rounds. Examine these to find that they are Spartan rounds, which are stronger than Hydra rounds, and harder to find. | 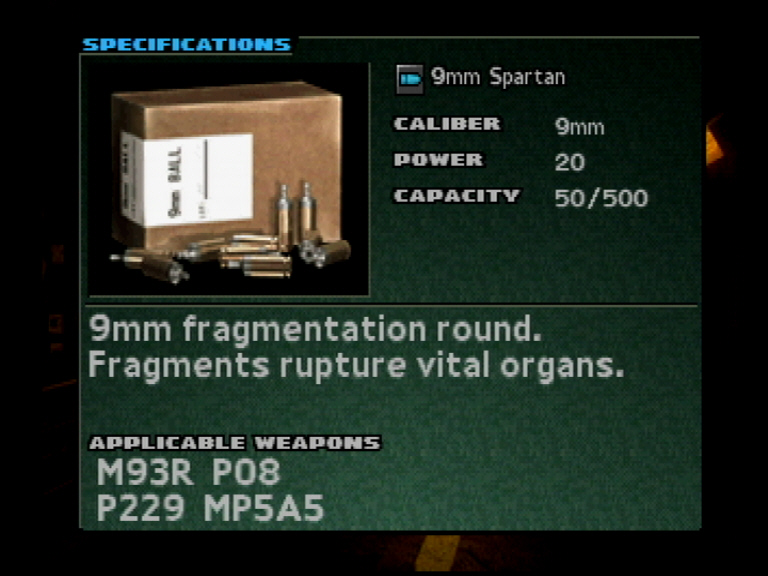 |
 |
This might be a good time to revive additional PE powers, if you haven't already done so. There is no point in letting the EXP pile up, unless you are saving it for a particular PE that you want at a high level. When you are ready, use the lift. |
PART 11: THE UNDERGROUND SHELTER
| Walk down the elevator hall. The first set of doors you pass is locked, so ignore it. Go down the hall, turn left, and go through the door at the end of the hall around the corner. Take out the six Rats and the two security devices, or Watchers, on the ceiling at the end of the hall. The Watchers, which give 15 EXP each but no BP, will shoot at you until you do. They can also inflict status conditions. Go through the door into the Storeroom. Here you will find three Rats and two Odd Strangers. There's a 9mm P.B. supply box on a table, and a Ringer's Solution on the central shelving unit. (You should attach this to your armor.) |  |
 |
Go
through
the door opposite the one you used to enter the room. |
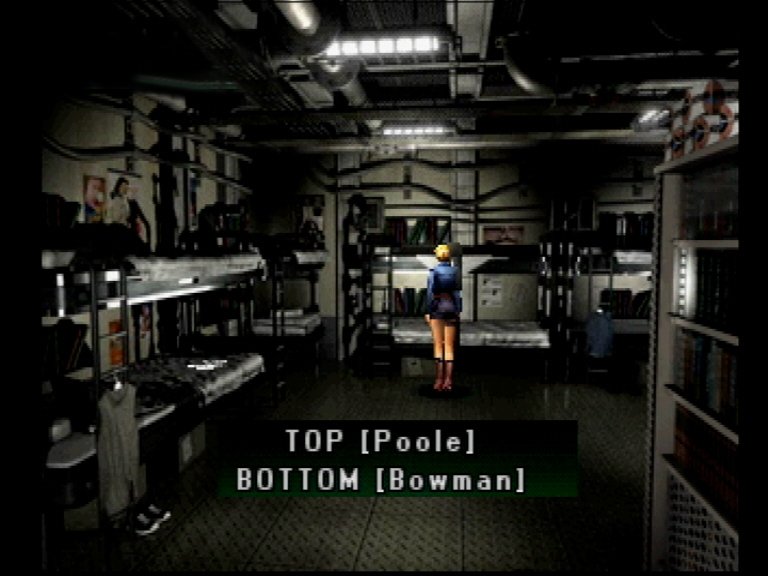
| Go through the door on the
left at the end of the hall, and into the
Sleeping
Quarters. You will find four Rats and an Odd Stranger
here.
Dispose of them, then look around. If you examine the locker
that's
missing a handle, you will read a strange note. Bowman must be
one weird
guy. There's nothing to see in the restroom, so go ahead and
check out
the bunk beds. Examine the pair belonging to |
 |
 |
Get rid of the two Brutes and three Watchers. Directly across from the Sleeping Quarters is the door to the Underground Parking area, which is locked. Enter the next door on the same side, which leads to the Control Room. Take out the two Green Amoebae and two Watchers in the Control Room Access Tunnel, then enter the Control Room. The door next to you is locked, so go down the stairs and eliminate the three Green Amoebae and four Watchers. (Sometimes the positioning is a little difficult when you're trying to get the Watchers. You may have to adjust where Aya's standing to get some of them.) Look through the large window into the next room, and then return to the main hall. |
| Walk across to the opposite door, which is the Armory. There is a locked door to a caged-off area, with a glowing red light beside it. If you examine it, you'll find that a card key is required to open it. Remember that Black Card dropped by the bomb-setting SWAT team member in the Akropolis Roof Garden? Now is the time to use it. After doing so, you can enter the Munitions Room. Stock up on Buckshot, 9mm P.B. rounds (which have about outlived their usefulness), and 9mm Hydra rounds. There is also a ? Shotgun - the SP12. It is a lot heavier than the PA3, but it has greater capacity, range, and rate of fire. Go ahead and unlock the door from the Armory to the Storeroom. | 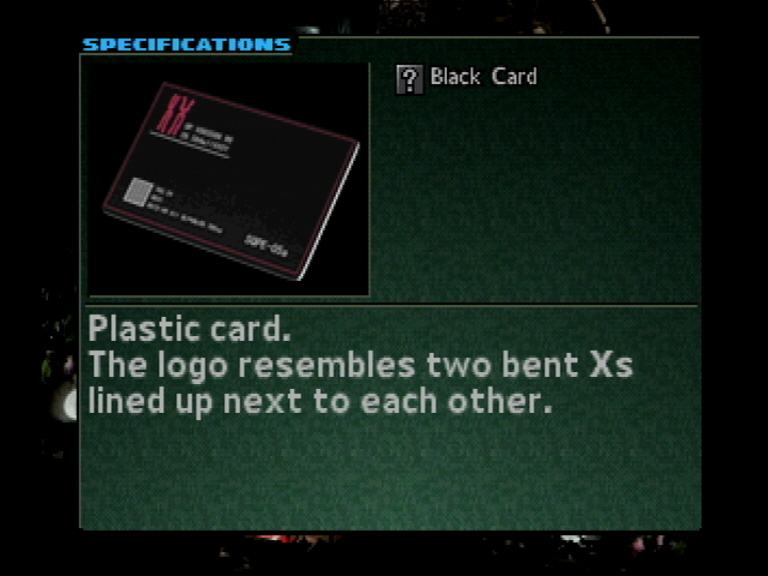 |
 |
Go
back
out into the
main part of the room, and look at the machine
with the
lighted display. Yes, however unlikely it may seem, it is a BP
vending
machine. Now, what to buy? M4A1 attachments are available,
as well
as some nice armor. As attractive as the PsySuit's features are,
the four
attachment slots kind of ruin it. If you really want to buy armor
here, I
would recommend the NBC Suit, as it has HP and MP bonuses, six
attachment
slots, and negative status resistances. It's cheaper, too.
I am wearing
the Combat Armor, now, though, and either of these choices will mean a
decrease
in HP, since it has a 40 HP bonus. It also has a built-in
GPS.
Knowing that better armor will be available a little later in the game,
I think
I'll stick with what I have for now, but do what you think is
best. |
| Here is a list of what's available: |
Weapons
|
P229 |
Semi-auto 9mm
w/silencer.
Flashlight attachment. |
1880 BP |
|
PA3 |
Pump-action
12-gauge shotgun. |
1000 BP |
|
M4A1 Rifle |
5.56mm
assault rifle.
Customizable with attachments. |
2450 BP |
|
Rifle Clip
Holder |
M4A1 magazine
clip holder.
Increases ammo capacity by 30. |
1800 BP |
|
M9 |
Close-combat
bayonet. Custom
M4A1 attachment. |
980 BP |
|
Hammer |
High-voltage
stun gun. Custom
M4A1 attachment. |
3720 BP |
|
Grenade Pistol |
Pistol-sized
40mm grenade launcher. |
1680 BP |
Ammunition
|
50 |
9mm P.B. |
9mm caliber
full metal jacket
round. For handguns and submachine guns. |
30 BP |
|
10 |
Buckshot |
12-gauge
shotgun scatter
shot. Spreads 9 lead shots in a burst. |
60 BP |
|
80 |
5.56mm Rifle |
5.56mm full
metal jacket
rounds. For rifles and light machine guns. |
100 BP |
|
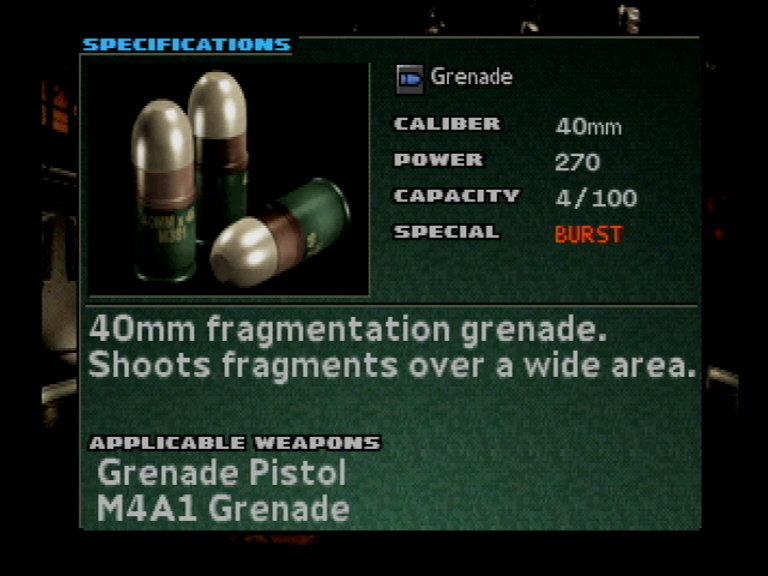
4 |
Grenade |
40mm
fragmentation grenade.
Shoots fragments over a wide area. |
280 BP |
|
4 |
Riot |
40mm special
acoustic sound.
Emits a glaring flash and loud noise. |
80 BP |
|
----- |
Batteries/Fuel |
Free reloads |
-------- |
Armor
|
Combat Armor |
Heavy police
body armor.
Helmet amplifier prevents Silence. |
3250 BP |
|
NBC Suit |
Environmental
NBC protection
suit. Suitable for long-term wear. |
3980 BP |
|
PsySuit |
Neo-mitochondria
labsuit.
Includes remote ANMC analyzer. |
4580 BP |
Items
|
Recovery1 |
Multi-vitamin
tablet - heals some
HP |
100 BP |
|
Recovery2 |
Analgesic
capsule. Heals HP. |
180 BP |
|
MP Boost1 |
Spring water
- restores some MP |
320 BP |
|
Penicillin |
Anti-bacterial
medkit - cures
Darkness, Paralysis, Poison |
80 BP |
|
Stim |
Restores
nerve function - cures
Silence, Berserker, Confusion |
80 BP |
|
Combat Light |
Disposable
defense weapon - blinds
enemies in front of you |
60 BP |
|
Pepper Spray |
Disposable
self-defense weapon -
use to stun surrounding enemies |
100 BP |
|
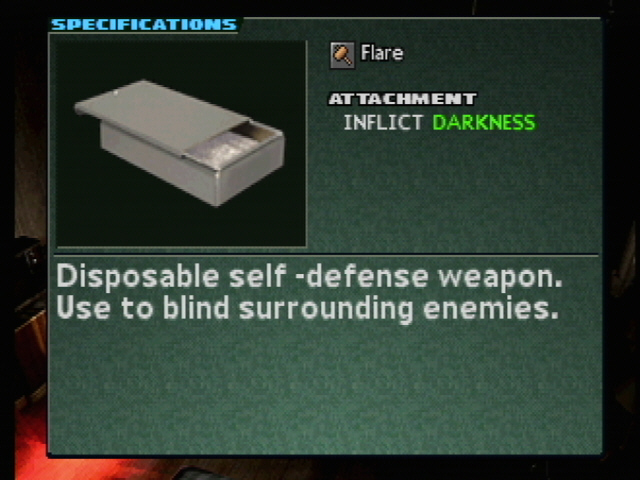
Flare |
Disposable
self-defense
weapon. Use to blind surrounding enemies. |
150 BP |
| When you're finished shopping, leave the room and go up to the door beside you marked EXIT. Unlock this door, which leads to the Elevator Hall, so it can be accessed from the other side. Now go all the way back to the other end and enter the Sterilization Room. |
PART 12: A NEW ENEMY AND AN OLD FRIEND
| Examine the panel in the middle of the far wall, then step through the door marked "In." Walk through the next door. A phone and a storage box await you. Open the storage box and store what you don't need. Take out the 20 Buckshot if you like, and definitely take out the 8 Grenades. Make sure you are in good health and equipped with recovery items, good weapons, and sufficient ammo. Then save the game. | |
| Go through the door and watch another confusing cutscene. You can't get through the door at the end of the hall, so take the lift down. You're now on B2, so the map has changed. Walk down the hall and get rid of the Brute and three Watchers. Walk through the door at the end of the hall, and enter the Septic Tank. Nice name. Defeat the two Bog Divers, and get the 10 Firefly shells. (Pyrokinesis works wonders on the Bog Divers.) Walk through the door at the other end of the path, and enter the B2 Main Corridor. There are three more Bog Divers here. Take care of them, then enter the door marked "Breeding Room." |  |
 |
Get the Cola from the cabinet, then read the very disturbing journal on the desk. (You knew Bowman was messed up, didn't you?) Examine the cages. There is a 9mm P.B. supply box in one corner. Take out the four Maggots and get the MP Boost2. In the corner of one of the cells is a can containing a Stim. Walk through the door into a new hallway. Turn the corner, and a strange creature drops from the ceiling, attacks Aya, and threatens her in distorted English. |
| You can't get into the Operating Room right now, so backtrack and clear B2 again, since it has been repopulated. In the Breeding Room, two Green Amoebae and three Maggots wait, and they will drop a Penicillin. There are three Bog Divers in the Main Corridor which drop 80 5.56mm Rifle rounds. In the Septic Tank, you will find two more Bog Divers, which drop a Recovery2. |  |
| Head to the Elevator and go back up. If you look at your map, you'll notice that your objective is on B1. Go back to the Sterilization Room. Store any items you don't want to carry, and save the game. By all means, save the game. If you have the Grenade Pistol and several grenades, make it your active weapon. Regardless of your equipped weapon, try to have an extra weapon and ammo combination attached to your armor. Also attach as many recovery items as you have room for. Go through the door marked "In." As you walk into the room, the fumigation system activates. Aya doesn't have much time, so go to the right of the door and get in the Dust Chute. | |
| Aya is dropped on her bum in the Dumping Hole on B3. (Hmm. Wonder if Luke and Leia are in here.) You can refill on 9mm P.B. in one corner, and 9mm Hydra in the other corner. Walk into the room a little way and you'll see a cutscene. Meet the Glutton. You need to stay back from it, because it can literally suck Aya up. When it does its "vacuum cleaner" attack, shoot into its open mouth for a lot of damage. Don't attack if you're too close, though. |  |
| I highly recommend using Grenades here, if you can. Constantly press on the down button to make Aya keep walking backwards when the monster is inhaling. After you do enough damage, it'll advance. Keep attacking the open mouth. If little ANMC's land on the floor, kill them immediately, because the Glutton can vacuum them up and regain lost HP. After you defeat the Glutton, you receive a Recovery3, 80 5.56mm Rifle rounds, and 4 Grenades. Look at the display at the back of the room, then go through the door. The door opens again behind you, though. Looks like you're not through with the Glutton. | |
 |
Run down the hall and around the corner, and when you see a little alcove to the right, run into it. You will step on a panel which starts raising the trash compactor floor. Stay in the alcove until the floor is all the way up, making Aya walk in the necessary direction to stay away from the Glutton's mouth. When the floor is up, run across it to the other side, trying to get the Glutton to follow you. Attack it, but stay back as much as you can. When it's directly over the compactor floor, the floor will start to sink. Go into the second little alcove and step on the other panel. The walls will start closing on the Glutton. (So there's the rest of the Star Wars scenario....) When it's been crushed, you will get a Recovery3. |
| You are warned that there are only five minutes till the incinerator is started, so you're going to have to move fast. Run back to where the Garbage Eater first appeared, and get the ? Woven Ring. Identify it as the Medicine Wheel, and attach it immediately. (If you use it, it will level up a Wind PE, but if you attach it, it will increase the items dropped after battles. I think it's one of the best items in the game. From this point on, I will have the Medicine Wheel attached, and this will affect what is dropped after battles. If you don't have it attached, you won’t get all the same items that I have listed.) Turn and run, but you'll be stopped by an unbelievable number of Creeping Strangers, Mad Chasers, etc. Defeat them if you have time, but run if you don't, or you might have to restore the game and defeat the Glutton again. Run down the hall and you'll get into another mass battle. Again, fight or run based on the clock. | 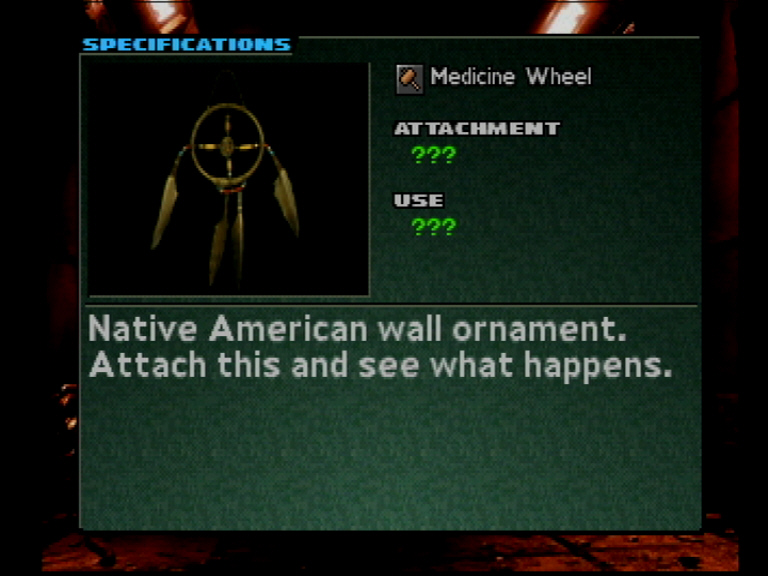 |
| I fought both battles, and these were my results: | |
|
Dumping Hole |
240 EXP, 552
BP, 36 MP |
Protein
Capsule, 80
5.56mm Rifle, 4 Airburst |
|
Garbage
Incinerator |
260 EXP, 568
MP, 47 MP |
50 9mm
Spartan, 10
Firefly, Belt Pouch |
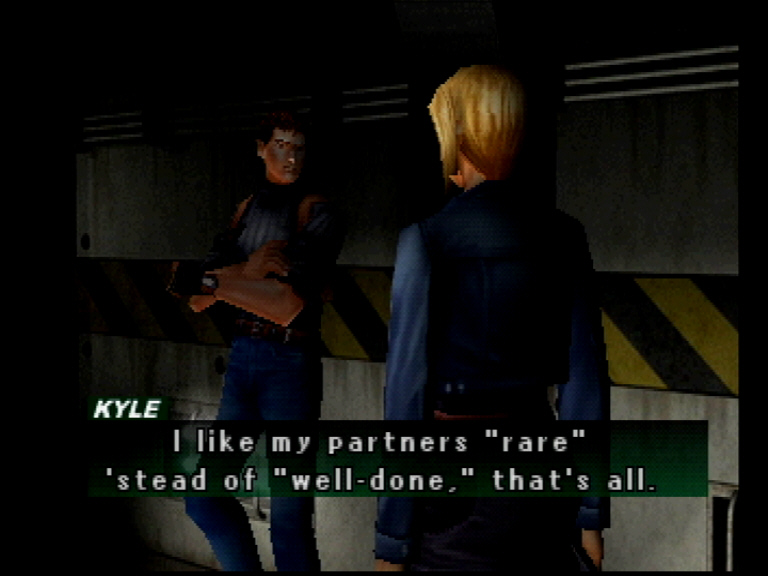 |
Run
to the door at the back end of the hall, and keep pressing X till
someone lets
you through. Well, hot dog! It's Kyle - he's still
alive! He
tells Aya his story, and they both decide to get out of there.
Save your
game at the phone, then go down the hall to the left beside the
phone. |
| Walk
down the hall and then take the stairs. There are a couple of
Mad Chasers down here, so get rid of them first. Go through the
door opposite
the
stairs. There are two Slouches and two Sucklercephs in
here. Go
to the end of the room and climb up the ladder. Take out the
Bog Diver.
Read the note on the box on the wall - it's a clue. Add the
number of
legs on a rat, a roach, and a spider. So 4+6+8=18. Now go
to the
control panel and enter 18, then raise the lever. The flood gate
opens. Run down the stairs and into the water. Back behind
the
stairs is an MP Boost2. |
 |
| Go through the passage in the side wall, and open the gates. Does this area look kind of familiar? Go around the corner and defeat a Bog Diver. You can try the gates behind you, but they're locked. We'll get back to them in a minute. Run down the passage, go up the stairs, and down a ladder. There's another Bog Diver here. Go through the door and take out yet another Bog Diver. Go up the stairs and down the hall. Unlock the door at the end. This will put you beside the phone you used after the Glutton battle. Save the game, then go back through the door you just used. | |
 |
NOTE: You can choose to ignore the next section and just go back up into the shelter, but you can't get the true ending if you do. This walkthrough will cover the path necessary for the true ending. If you choose not to go back to Dryfield, go up the elevator to B2 now instead of returning to the Lower Sewer. There will be a cutscene in the elevator. Kyle will tell Aya that the password is MelissaMaya, and give her the Yoshida Card. They will then split up to cover more ground. |
PART 13: BACK DOOR TO DRYFIELD
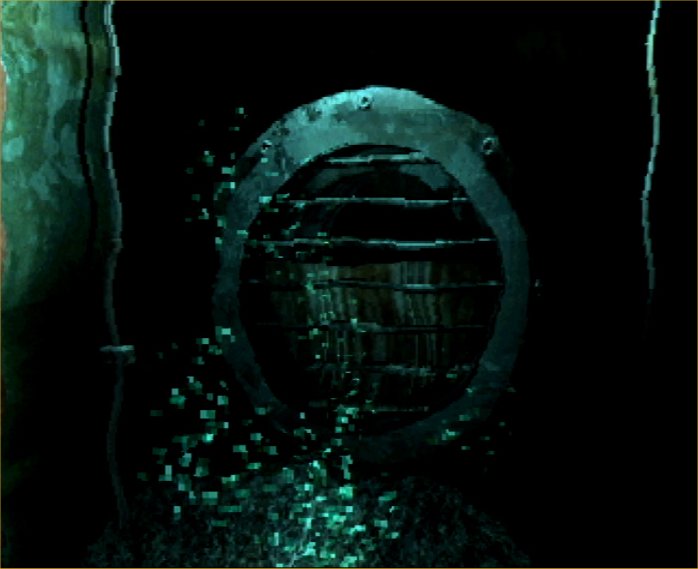
| Follow the hallway back to the Lower Sewer. Go through to the Upper Sewer and examine the wall beside the door. It has a clue for the Full Moon Gate. Run across to the panel with the glowing blue light. Examine it, and you'll find it's the Full Moon Gate control. What to do? Well, according to the memo, the code for the gate is the day when the moon's fullest. That's a little hard to predict, so they probably want a number you'd be able to guess. Let's say the middle of the month is the 15th. Try 15 - it works. Run back across to the corner and climb the ladder, then run straight across to the set of gates, which are open now. | 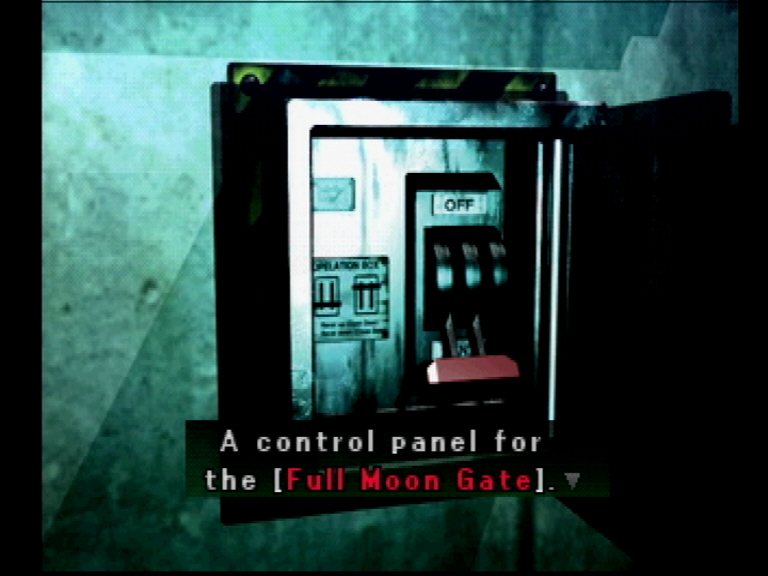 |
 |
Go through
them, and what do you know? You're back in Dryfield -
at the
bottom of the well behind |
| There are
four Blood Sucklers and three Scavengers in the
G
& R
kitchen, and a
Desert Chaser and six Moths on |
 |
 |
There
are five Mind Sucklers on the second floor balcony and six Scavengers
in
the
Loft. You'll find five Scavengers in the restroom across from the
Lobby. There are two Odd Strangers and three Moths upstairs in
Room 5,
and four Blood Sucklers and one Odd Stranger in Room 3. Now go
back out
in front of the General Store. There are three Mind Sucklers and
a
Zebra Stalker here. Unlock the back of Pierce's SUV and get the Tactical
Vest (remember the armor from the |
| The first
room of the Dilapidated House holds seven Moths and three
Scorpions,
and the second contains two Scavengers and three Scorpions. Down
under
Dryfield, there are seven Mind Sucklers in the Underpass, and eight
Bats and
two Scavengers in the Cellar. Finally, you will find three
Zebra Stalkers in the Garage. Head on back and talk to |
 |
| Here is what he has available: | |
|
P08 |
Semi-auto 9mm
w/special loader. |
680 BP |
|
MP5A5 |
9mm
submachine gun.
Flashlight attached. |
6980 BP |
|
PA3 |
Pump-action
12-gauge shotgun. |
1000 BP |
|
AS12 |
Rapid-fire
12-gauge combat shotgun. |
12500 BP |
|
M4A1 |
5.56 mm
assault rifle.
Customizable with attachments |
2450 BP |
|
Rifle Clip
Holder |
M4A1 magazine
clip holder.
Increases ammo capacity by 30. |
1800 BP |
|
M9 |
Close-combat
bayonet. Custom
M4A1 attachment. |
980 BP |
|
M203 |
40mm grenade
launcher. Custom
M4A1 attachment. |
2130 BP |
|
Pyke |
Small
portable flamethrower.
Custom M4A1 attachment. |
5180 BP |
|
Grenade Pistol |
Pistol-sized
40mm grenade launcher. |
1680 B |
Ammunition
|
50 |
9mm P.B. |
9mm caliber
full metal jacket
round. For handguns and submachine guns. |
30 BP |
|
50 |
9mm Hydra |
9mm
hollow-point round. Soft
tip increases tissue damage. |
50 BP |
|
10 |
Buckshot |
12-gauge
shotgun scatter shot -
spreads 9 lead shots in a burst |
60 BP |
|
10 |
Firefly |
12-gauge
shotgun incendiary
shot. Ignites flammable target. |
90 BP |
|
80 |
5.56 mm Rifle |
5.56 mm full
metal jacket round -
for rifles and light machine guns |
100 BP |
|
4 |
Grenade |
40mm
fragmentation grenade.
Shoots fragments over a wide area. |
280 BP |
|
4 |
Riot |
40mm special
acoustic round.
Emits a glaring flash and loud noise. |
80 BP |
|
--- |
Batteries/Fuel |
Free reloads |
------- |
Armor
| Combat Armor |
Heavy police
body armor. Helmet amplifier
prevents Silence. |
3250 BP |
| NBC Suit |
Environmental
NBC protection suit.
Suitable for long-term wear. |
3980 BP |
| PsySuit |
Neo-mitochondria
labsuit. Includes remote
ANMC analyzer. |
4580 BP |
Items
|
Recovery1 |
Multi-vitamin
tablet - heals some HP |
100 BP |
|
MP Boost1 |
Spring water
- restores some MP |
320 BP |
|
Penicillin |
Anti-bacterial
medkit - cures
Darkness, Paralysis, Poison |
80 BP |
|
Stim |
Restores
nerve function - cures
Silence, Berserker, Confusion |
80 BP |
|
Combat Light |
Disposable
defense weapon - blinds
enemies in front of you |
60 BP |
| Pepper Spray |
Disposable self-defense weapon - use to stun surrounding enemies | 100 BP |
| Save the game, and make your way back to the shelter. |
| In the Upper Sewer, a Mossback and two Bog Divers drop 10 Firefly shells. Walk through the door at the far end and up the stairs to B3, then get rid of the two Mad Chasers there. Go around the corner and take the lift to B2. There are seven Maggots in the Elevator Hall. After disposing of them, unlock the door and enter the Main Corridor. A Mossback and a Bog Diver drop 10 Firefly shells. There are another Mossback and Bog Diver in the Septic Tank. Another Mossback and three Maggots in the Pod Access Tunnel drop 10 Firefly shells. Go back to the Main Corridor and enter the Breeding Room. Defeat the two Mad Chasers, one Slouch, and two Sucklercephs. | |
 |
Continue into the hallway, and take out the two Slouches and three Creeping Strangers. Examine the door at the end of the hall. You will need a card key to open it. Return to the Elevator Hall and go up to B1. There are three Zebra Stalkers in the B1 Elevator Hall. Enter the South Maintenance Walkway and defeat two Brutes and three Green Amoebae. In the Storeroom, get rid of the six Green Amoebae and one Red Amoeba, which will give you lots of BP. Make sure you've healed, then head into the North Maintenance Walkway. Congratulations . . . you've found the creepy thing that threatened you earlier. Meet the ANMC formerly known as Bowman. He is now a Brain Stinger, which will drop a ? Card after you defeat it. Examine it in the Key Items menu. |
| Continue through the hall and enter the Sleeping Quarters. There are five Green Amoebae and two Red Amoebae here. Enter the Main Corridor and take out three more Zebra Stalkers. Get the two Brutes in the Pod Access Tunnel, and save the game in the Sterilization Room. In the Control Room Access Tunnel are a Brute and two Watchers. If you check your map, you'll find that the mine is hot again, too. | |
| Take the lift in the southwest corner of B1 back up to the mine. There are two Zebra Stalkers in the Cavern and six Mind Sucklers in the Gorge. Move into the Tunnel and get rid of the seven Bats and three Scorpions. There are two Scorpions and eight Moths in the Forked Tunnel, and three Zebra Stalkers in the Tunnel Entrance. Out on the mesa, you'll find two Scorpions and four Mind Sucklers. If you need anything from the truck's storage box, get it now. (All right, who left the truck lights on?) Save your game in the Refuge, then take the lift back down. Stop in at the Armory if you need to stock up, then take the elevator down to B2. | 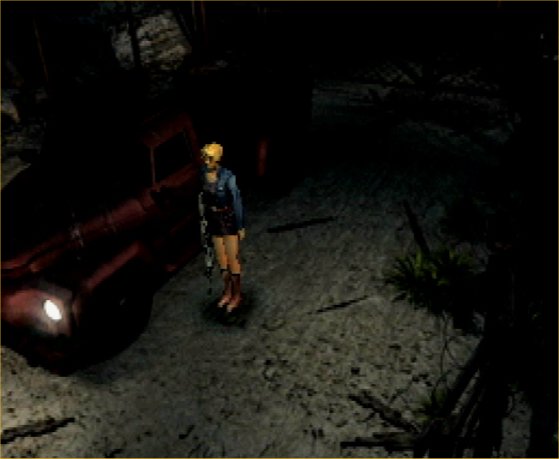 |
 |
Examine the card reader beside the door in the northeast corner of the Elevator Hall, and Bowman's Card will open it. There are four Green Amoebae and four Watchers here in the South Maintenance Hallway. Unlock the door to the Operating Room and enter. Remember seeing this room somewhere? There are three Creeping Strangers, one Skull Stalker, and two Slouches here. Find the Ringer's Solution on the shelves and the Eau de Toilette in the lab coat hanging on the wall. Go through the door into the Laboratory. There is another storage box here, as well as a phone. Store any unnecessary items and save the game. |
| Examine the incubator, which is next to the door. Eve and Aya cells? Look at the computer that's been left on. Notice the wallpaper? We need a password. Examine the white board twice. Apparently the answer is in a magazine, and the magazine was borrowed by Yoshida. |  |
| Return to B1 and enter the Sleeping Quarters. (You can unlock the door to the Main Corridor and get to the elevator from here - it's faster.) The Aeris, Sept. issue magazine (FF VII reference) is on Yoshida's bunk. Read it, and it will explain how to deal with the virus. Return to the Laboratory. | |
 |
Okay, the virus has changed the password. It displays the old password in the background, so we know that it has rearranged MELISSAMAYA in the manner described in the magazine. Enter A3EILM2S2Y. You'll have to use the Visitor Program option, and answer three random questions to get in. Aya types in questions, and gets some unpleasant answers. Apparently Aya was the source of the cells used the develop ANMC's. The phone behind her rings - it's Pierce. He wants Aya to meet him on B1 at the Pod Service Gantry. There's a glowing red spot on your map to show you his location. Before meeting Pierce, though, let's clear out some new hot areas. |
|
B2 Elevator
Hall |
3 Mossbacks |
10
Firefly, 10 R. Slug |
|
West Mine
Secret Passage |
2 Brain
Stingers |
|
|
B1 North
Maintenance Walkway |
4 Skull
Stalkers, 3 Sucklercephs, 2 Slouches |
|
| You will learn a lot about the shelter from Pierce. There's a phone here, too, so you can save your game. Look at the Arkcam again. You can press the "Operate" button on various cameras to open doors, activate elevators, and disable the security system. Much of the shelter is hot again, so clear it out before continuing. |  |
B1
|
Pod Access
Tunnel |
2 Mossbacks |
80 5.56mm
Rifle |
|
Main Corridor |
2 Brain Stingers |
|
|
Sleeping
Quarters |
2 Mad Chasers, 2 Creeping Strangers |
|
|
Storeroom |
2 Brain Stingers |
|
|
South
Maintenance Walkway |
Red Amoeba, 4 Green Amoebae, 3
Maggots |
|
|
Elevator Hall |
2 Brain Stingers |
|
B2
|
South
Maintenance Walkway |
2 Mossbacks, Creeping Stranger |
Protein
Capsule |
|
Operating Room |
7 Maggots |
|
|
North
Maintenance Walkway |
Brute, 3 Slouches |
|
|
Breeding Room |
2 Mad Chasers, Slouch, Skull Stalker |
|
|
Septic Tank |
Bog Diver |
|
|
Pod Access
Tunnel |
Brain Stinger |
|
B3
|
Elevator Hall |
Mossback, 2
Green Amoebae |
B4
|
Lower Sewer |
2 Bog Divers, 2 Skull Stalker,
Creeping Stranger |
|
|
Upper Sewer |
2 Red
Amoebae, 2 Bog Divers |
Eau de
Toilette |
That
should clear out the shelter. I would really recommend returning
to the
Armory to stock up on ammo, buy items, and recharge weapons. You
want to
be ready before tackling
PART 15:
 |
Watch
the
cutscene and movie. Follow the hall to the
Observatory. Wow... |
| Now
go
back to the
slider. Notice the colored lines on the sides,
and
their direction. You need to line up the tiles in the order above
by
color, one at a time. Blue is indicated on the first line across,
so
let's start there. Line up the blue tiles in the right order on
the first
row, and move the other tiles so that the open spot is in the bottom
corner
with the double circle showing, as it was originally. You will
hear a
click. Walk to the stone box and search it for an MP Boost2. |
|
| Go back to the puzzle and arrange the yellow tiles in order in the first column, leaving the open space in the bottom right again. A gate will close behind you and a panel will open in the ceiling, dropping three Black Beetles on you. Defeat them, and get a Recovery2 and an MP Boost2. Now do the red row on the puzzle. It should run diagonally from the lower left corner to the upper right corner, again leaving the open space in the bottom right. This will unlock the door across from the hieroglyphic panel. | |
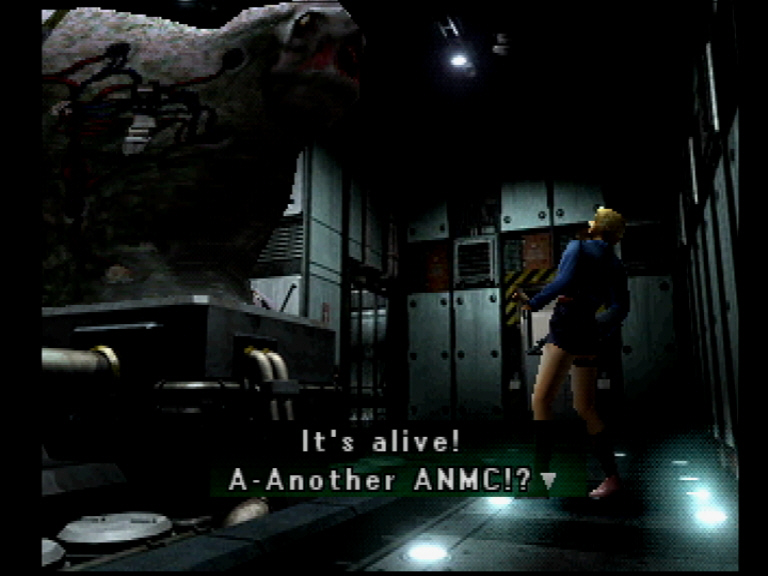 |
Go open the door and enter the Power Plant. Take out Generator A (after destroying the Watchers and life support system). A Recovery3 and MP Boost2 are dropped. This room is still hot - apparently there is something on the other side of the room, but you can't get through. Retrace your steps, and get rid of the seven Black Beetles in the Savanna Zone. Apparently your work in the Power Plant has set off a fire alarm. The North Promenade is open now. Head that way. You will encounter a Horned Stranger in the Forest Zone, and get a Recovery3 and an MP Boost2. |
| The gate beside you says "Temple of Tlaloc/Shrine of Time." Open it and walk through. You are now in the Jungle Zone, and there are two more Spiked Intruders here. Walk farther down the path and find another Spiked Intruder. Walk through the next gates into the Pyramid area, and you will be attacked by nine Beetles. Beside you is what looks like a stone clock. Examine it, and spin it until the symbols match. Look at the designs in the stone. Now go through the Submarine Tunnel and defeat the three Divers in the Pavilion. | 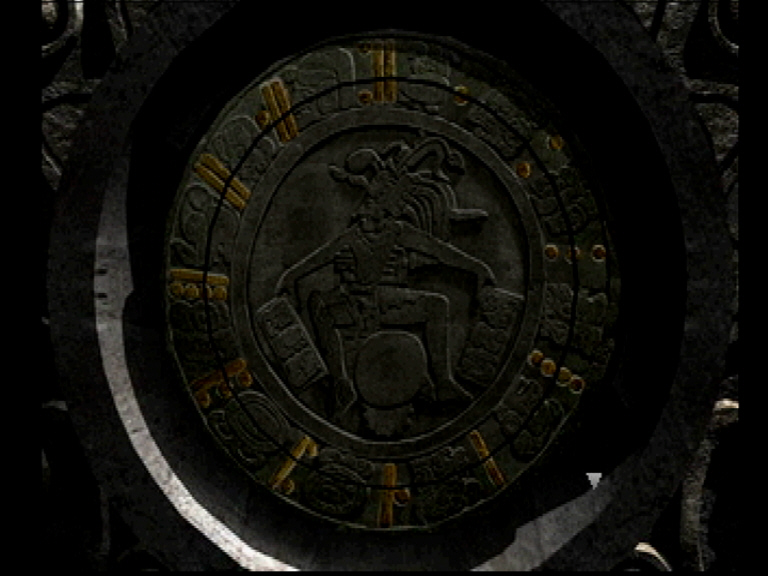 |
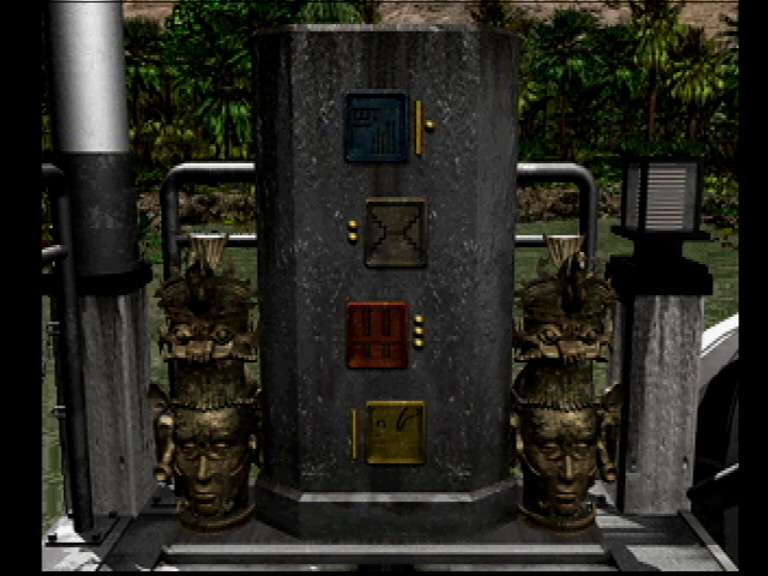 |
Examine the
stone panel, and take notes, because you will need this information for
the second Pyramid Puzzle. Walk
across the
Bridge and take out the three Divers. Continue to the Garden, and
you'll
encounter ten Beetles. Go look at the Neo Ark map, and Aya will
load it
into her GPS. Examine the blinking light next to the map - B6:
Eve
Testing Area? Examine the large stone panel with stone tiles, and
write
these clues down. You will need them to solve a puzzle at the
Pyramid. The Power Plant door is locked, so return to the
Pyramid. As
you go, you will have to take out two Divers and three
Beetles
on the Bridge, and a Spiked Intruder in the Forest Zone. Go to
the |
| Walk to the right of the steps and read the gold plate. Write down the clues, and use these and the other clues you've gotten to determine the order to step on the tiles. Walk up the steps of the Pyramid and step on the tiles in this order: | |
| Red Yellow Blue White Blue White Red Yellow White Blue Yellow Red | |
| You can tell when you're doing it right, because a shaft of light will shine from each tile when you step on it. Aya will hear something in the distance to the west. Some areas are hot again, so take care of them. | 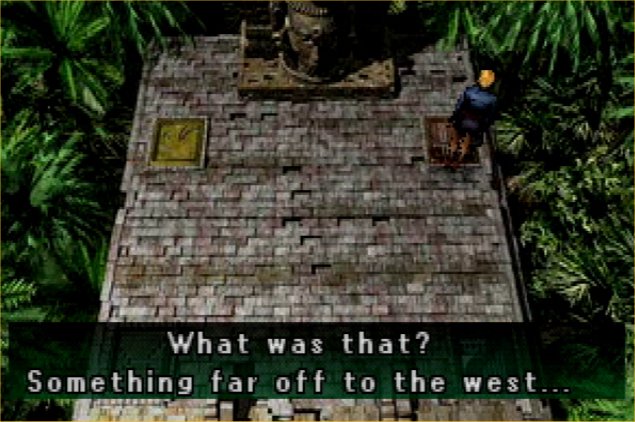 |
|
Pyramid |
6 Maggots |
|
Jungle Zone |
2 Horned Strangers |
|
Forest Zone |
4 Horned Strangers |
|
Pavilion |
3 Bog Divers |
|
Bridge |
Mossback,
Bog Diver |
|
Garden |
Mossback, 6
Black Beetles |
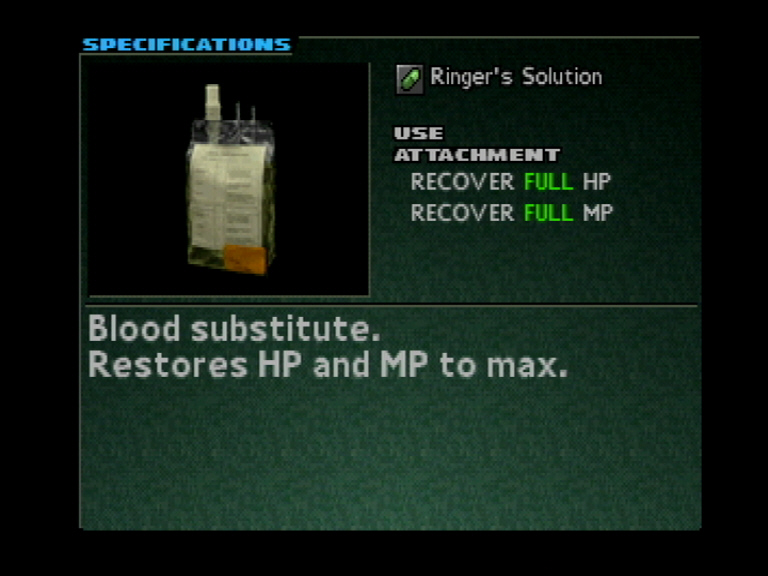 |
Return to the back of the Power Plant. The door is open now, so read the sign beside it, then go inside and walk all the way down the hall. There is a 9mm Hydra ammo box here, so stock up. Now go back and up the stairs, and watch the cutscene. Here's Generator B. Very attractive. Once again, you'll need to dispose of the hardware first. If you've got grenades, try them on Generator B, which drops an MP Boost2 and a Ringer's Solution. |
| Several areas are hot again. You know what to do. | |
|
Pavilion |
Mossback,
Bog Diver |
|
Forest Zone |
10 Black Beetles |
|
Jungle Zone |
4 Horned Strangers |
|
Pyramid |
5 Black Beetles, 3
Maggots |
|
Shrine |
4 Black Beetles, 4
Scorpions |
| Return
to
the
Pyramid. Using the information you've collected, including that
from the stone panel in the Pavilion, determine the order to step on
the tiles this time. Go up the temple steps
and do the
following: |
|
| Step on
the blue tile
six times. Step on the white tile twice. Step on the red tile three times. Step on the yellow tile five times. |
|
| Examine
the statue, and lower the lever that has appeared. The Bridge
from the
Pavilion will move. Return to the Bridge and cross to the small |
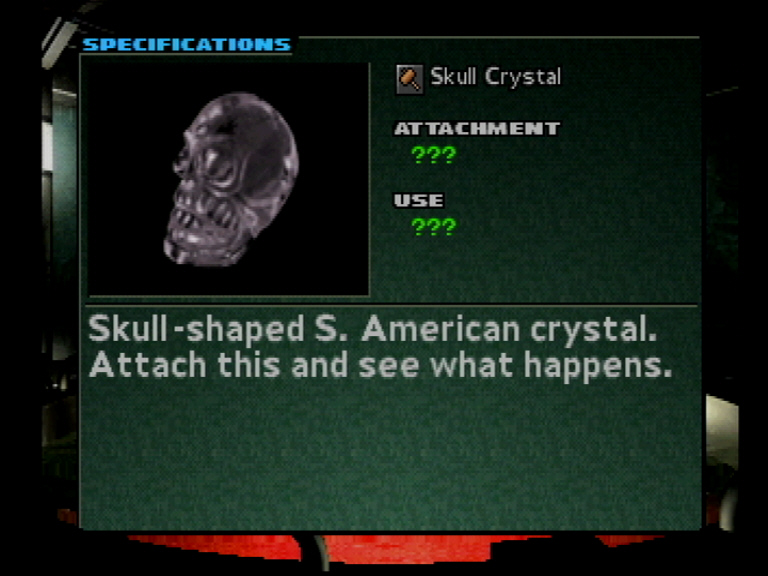 |
PART 16: ALL ABOUT EVE
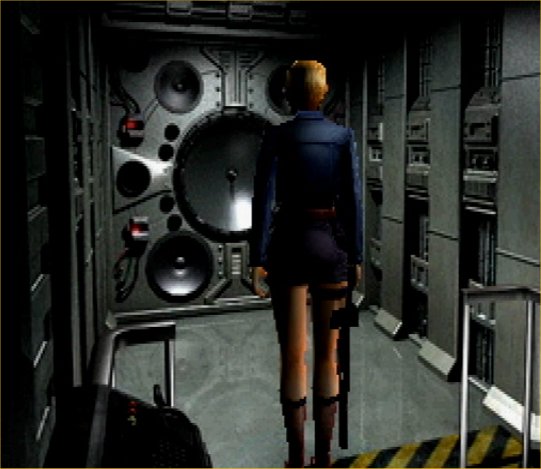 |
Go to the B2 lift marked "Particular Area" and go down. There are two Derangement Speakers, which drain MP, and five Watchers in this area. Get rid of them as quickly as possible. Go down another elevator. There is a Derangement Speaker here, as well as a Mossback. After defeating them, Aya will get a Recovery3 and an MP Boost2. Aya will see the little girl, Eve, again, and this time she is wearing a helmet. Follow her through the door. There are two more Derangement Speakers here, as well as the Puppet Stinger, which Eve seems to be controlling. Grenades do a bit of damage here, and they prevent the boss from attacking. If you don't have many grenades, use your main weapon on him a few times, then use a Grenade when you hear him power up for an attack. This will keep him from attacking, and give you a chance to do some more damage with your main weapon. If you have it, try the M4A1 with the M203 Grenade Launcher for this, since it allows you to use one weapon for both purposes. After the battle, you get an MP Boost2, Ringer's Solution, and Eau de Toilette. |
| Eve will flee, and Kyle will show up. A cutscene will follow. Pierce calls and wants Aya up there ASAP, and then he gets cut off. Save the game, then talk to Eve and Kyle. Inspect Eve's toys and drawings, and get the ? (MD) Player from the cabinet. There is a Ringer's Solution hanging from the IV stand. Try to leave, and the room will go dark, fill with gas, and be invaded by golem soldiers. Kyle will shoot a hole in the wall for the girls to go through, and then stay to hold off the soldiers. |  |
 |
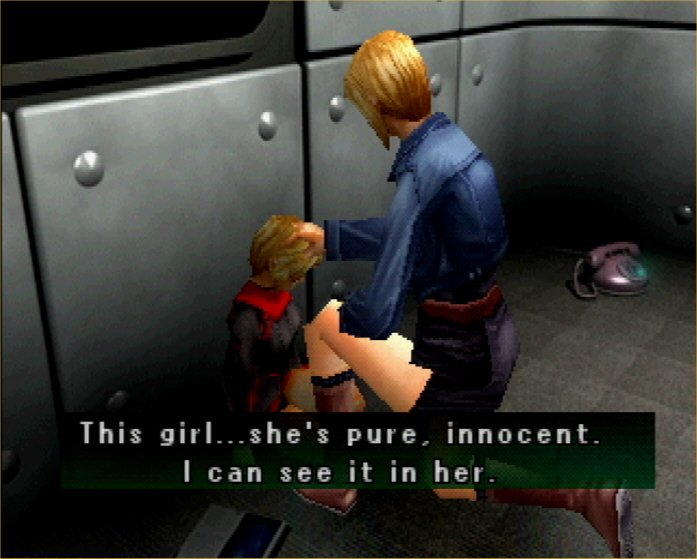 |
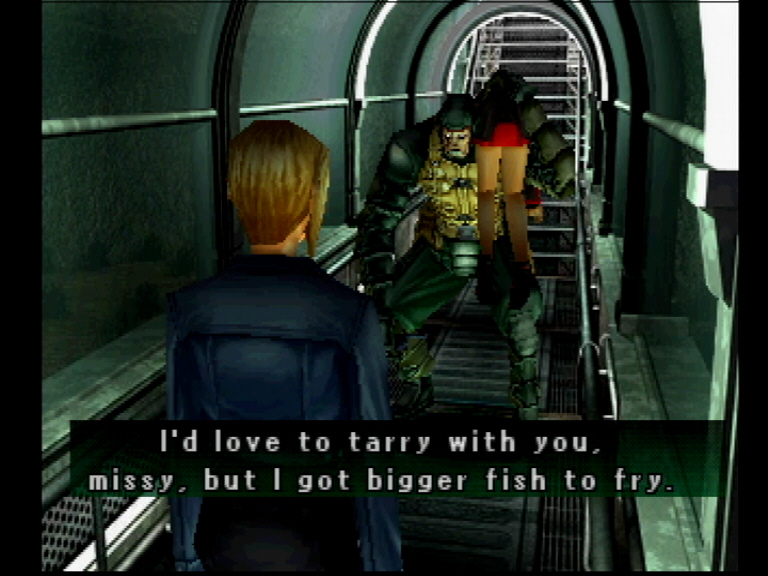 |
Run back to the corner cabinets and find a Protein Capsule. Then go look at what Eve's staring at, and talk to her. She will follow you to the lift, but only if you walk (by holding down O while you move). You must move slowly. If she stays in the room too long, the gas will kill her, so time is important here. When she's on the lift with you, examine it and go up. You'll come out by the Neo Ark map. Eve will run off , and you need to follow her. If you look at the map, you'll see that Neo Ark is full of hot spots again. Shoot the three Bog Divers from the Bridge, and four from the Pavilion. Walk into the Submarine Tunnel, and you'll hear Eve scream. It's No 9, the jerk, and he's got Eve. Follow them, cleaning out Neo Ark as you go. |
|
Forest Zone |
2 Horned Strangers, Pawn Golem |
50 9mm
Spartan |
|
Jungle Zone |
4 Horned Strangers |
|
|
Pyramid |
Horned Stranger, 2 Pawn Golems |
50 9mm
Spartan, 80
5.56mm Rifle |
|
Bridge |
3 Bog Divers |
|
|
Submarine
Gallery |
Bog Diver |
|
|
North
Promenade |
3 Pawn Golems |
50 9mm
Spartan, 80
5.56mm Rifle |
|
South
Promenade |
2 Pawn Golems |
4 Grenades, 4 Riot |
|
Savanna Zone |
2 Pawn Golems |
50 9mm
Spartan, 4 Riot |
|
Shrine |
2 Pawn Golems |
50 9mm
Spartan, 80
5.56mm Rifle |
|
Power Plant
(south) |
4 Scorpions,
5 Black Beetles |
|
| Notice how all the ANMC's seem to be dying? Go back up to the Pod Service Gantry to find that Pierce is not there. Turn off the security system again. Get the ? Message off the phone and examine it in the Key Items menu. It is a memo from Pierce. Call HQ immediately, and save the game. Before proceeding, go ahead and clear out the other hot areas, which include Dryfield. |
B1
|
Elevator Hall |
Rook Golem,
Pawn Golem |
80 5.56mm
Rifle, 4
Riot |
|
South
Maintenance Walkway |
Pawn Golem, 2 Watchers |
50 9mm
Spartan |
|
Storeroom |
2 Pawn Golems |
50 9mm
Spartan, 4 Riot |
|
Main Corridor |
Pawn Golem,
Rook Golem |
4 Airburst, 4 Riot |
|
Pod Access
Tunnel |
Rook Golem, 3 Watchers |
80 5.56mm
Rifle |
|
Sleeping
Quarters |
Knight Golem |
MP Boost2, Penicillin |
|
North
Maintenance Walkway |
Rook Golem, 4 Watchers |
4 Airburst |
|
Control Room
Access Tunnel |
Pawn Golem, 2 Watchers |
50 9mm
Spartan |
|
Control Room |
6 Watchers |
|
|
Elevator Hall |
Rook Golem, 4 Watchers |
4 Airburst |
|
Septic Tank |
2 Divers, 2 Watchers |
|
|
Pod Access
Tunnel |
Rook Golem, 2 Watchers |
80 5.56mm
Rifle |
|
Main Corridor |
Rook Golem, 2 Watchers |
80 5.56mm
Rifle |
|
South
Maintenance Walkway |
Red Amoeba, 4
Caterpillars |
Belt Pouch |
|
Operating Room |
Sucklerceph, 3 Slouches, 4 Green
Amoebae |
|
|
North
Maintenance Walkway |
2 Creeping Strangers, 2 Mad
Chasers, Skull Stalker |
|
|
Breeding Room |
4 Black Beetles, 2
Maggots |
|
B3
|
Elevator Hall |
2 Brain Stingers |
B4
|
Lower Sewer |
Mossback, 2
Bog Divers |
|
Upper Sewer |
Bog Diver, Brain Stinger |
|
Water Supply |
2 Bog Divers |
|
Reservoir |
2 Bog Divers |
Dryfield
|
Water Hole |
3 Zebra Stalker |
|
|
Driveway |
5 Mind Sucklers, 3 Scorpions |
|
|
Junk Yard |
Zebra Stalker, 4 Mind Sucklers |
|
|
Breezeway |
3 Scorpions,
6 Mind Sucklers |
4 Airburst |
|
Water Tower |
4 Scorpions,
2 Zebra Stalkers |
|
|
Parking Area |
11 Bats |
|
|
Room 1 |
3 Scavengers |
|
|
Room 2 |
4 Moths, 2 Scavengers |
|
|
General Store |
3 Rats, 2 Scavengers |
|
|
Back Street |
14 Bats |
|
|
Dilapidated
House, Room 3 |
5 Scavengers |
|
West Mine
|
Secret Passage |
3 Zebra Stalkers |
|
Cavern |
2 Brain Stingers |
|
Gorge |
12 Bats |
| After
cleaning out all areas again, go to B1 and enter Underground
Parking for
the first time. There are six Watchers and a Rook Golem in the
Transfer Tunnel. After the battle, you will get 80 5.56mm
Rifle rounds. Sometime after you enter
the
Access Tunnel, you'll be grabbed from behind by an invisible Knight
Golem. When it lets go, try to put your back to the wall, or,
better yet,
a corner. Metabolism is good here, because the golem inflicts
negative
status
conditions. Keep a grenade loaded, and target and shoot the golem
when it
appears. It will drop an MP Boost2 and Penicillin.
Run to the south end of the hall and unlock the door to the Control
Room. Then enter the Golem Freezer and examine the central
column, which
has some interesting information about the golems. |
|
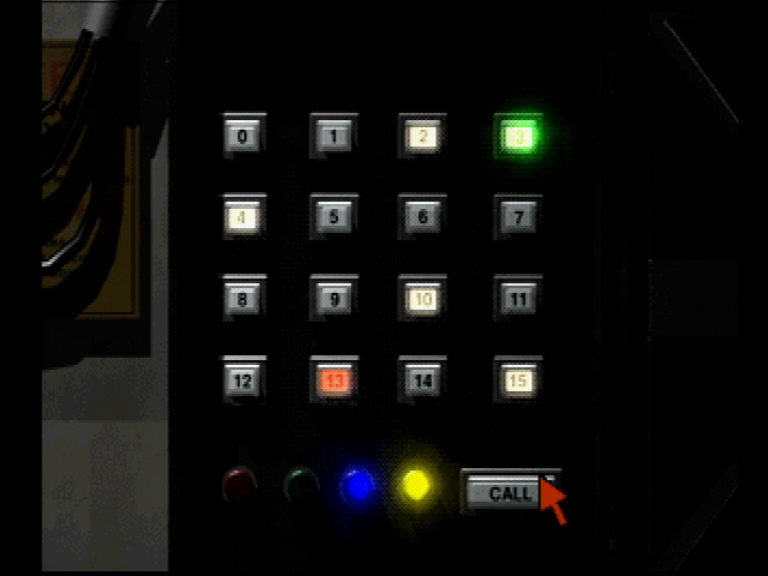 |
Enter the door to Underground Parking, and use the phone on the wall to save the game. Look at the control panel in the southeast corner of the room - it's on the wall by the large door. Take the ? Car Key. Look at the box again, and press the red, green, and yellow buttons, and then press Call. Open the box that appeared to the left and get the Belt Pouch. Go back to the box and turn off the red and green lights, and turn the blue one on. Then press Call again. This will reveal the electric car. Start it, and you will drive onto the turntable in the floor. Go to the red stand in the northwest corner and examine it. It will tell you to use a key card to open the shutter. Go to Key Items and use Bowman's Card. Press X to use the car again. You won't go far, because the way is blocked. |
| Go through the door to the Pedestrian Airlock. There's another Knight Golem in here. It'll drop a Ringer's Solution and 10 R. Slug shotgun shells. Open the door to the Vehicular Airlock and fight the Rook Golem and Pawn Golem, which drop 50 9mm Spartan rounds and 4 Airburst grenades. There's a motorcycle here - recognize it? Search it to find Eve's Teddy Bear. | 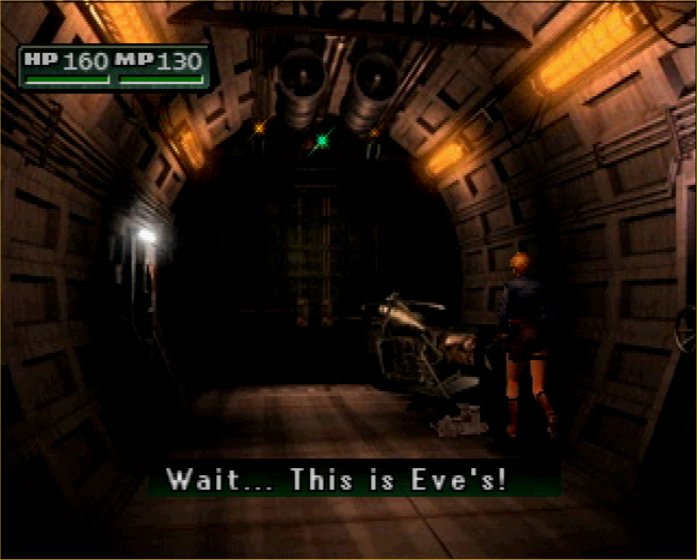 |
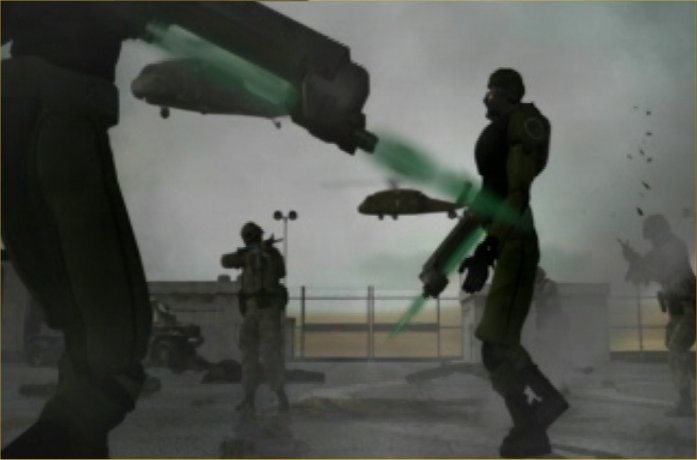 |
Open the door to the Guardroom. Go to the end and examine the door. Choose to press the switch, and you'll hear a sound somewhere. Go back out to the Vehicular Airlock and examine the large door to enter the Bulwark. There are two Rook Golems here, which drop 80 5.56mm Rifle rounds and 4 Airburst grenades. Use the panel to open the door to the Heliport area and watch a very interesting movie and cutscene. |
| When you regain control, look
at
the map on the table, and Aya will
enter it in
her GPS. Get the Ringer's Solution in the back
corner, and
the 4 Airburst grenades nearby. Save the game. Walk
back
outside, and you will be greeted by |
 |
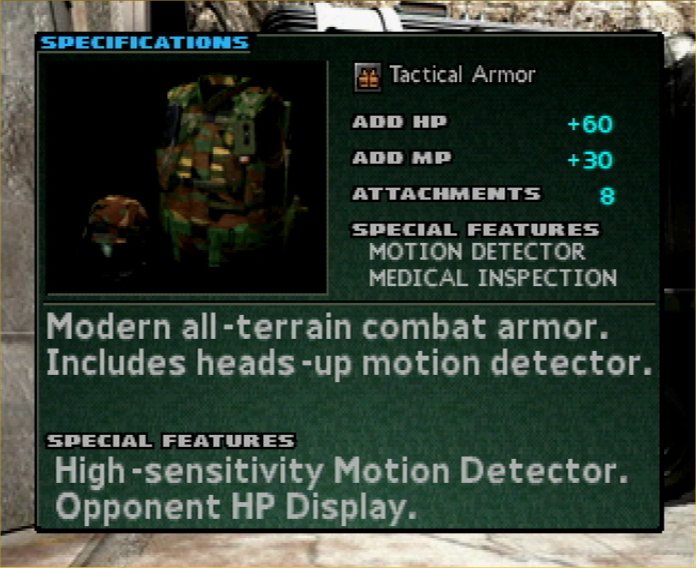 |
The soldier opposite Jodie will
let you stock up on ammo. Talk to
the
soldier at the back of the truck to make some BP purchases. Store
items,
buy what you need, and save the game again. The Tactical Armor
is
available now, and it is wonderful. The Aya Special is great,
too.
I do not recommend buying the Javelin, though it is a great
attachment
for the M4A1. If you have the Medicine Wheel attached, it will be
dropped
in an upcoming battle, saving you 7500 BP that can be used
elsewhere.
Give the Teddy Bear to |
Weapons
|
MP5A5 |
9mm submachine
gun. Flashlight
attached. |
6980 BP |
|
SMG Clip Holder |
MP5A5 magazine clip
holder. Increases
ammo capacity by 30. |
3980 BP |
|
PA3 |
Pump-action 12-gauge
shotgun. |
1000 BP |
|
AS12 |
Rapid-fire 12-gauge
combat shotgun. |
12500 BP |
|
M4A1 Rifle |
5.56mm assault
rifle. Customizable
with attachments. |
2450 BP |
|
Rifle Clip Holder |
M4A1 magazine clip
holder. Increases
ammo capacity by 30. |
1800 BP |
|
M9 |
Close-combat
bayonet. Custom M4A1
attachment. |
980 BP |
|
M203 |
40mm grenade
launcher. Custom M4A1
attachment. |
2130 BP |
|
Hammer |
High-voltage stun
gun. Custom M4A1
attachment. |
3720 BP |
|
Pyke |
Small portable
flamethrower. Custom
M4A1 attachment. |
5180 BP |
|
Javelin |
Small laser gun.
Custom M4A1
attachment. |
7500 BP |
|
Grenade Pistol |
Pistol-sized 40mm
grenade launcher. |
1680 BP |
Ammunition
|
50 9mm Spartan |
9mm fragmentation
round. Fragments
rupture vital organs. |
80 BP |
|
10 Firefly |
12-gauge shotgun
incendiary shot.
Ignites flammable target. |
90 BP |
|
10 R. Slug |
12-gauge shotgun solid
shot. Powerful
shot with good accuracy. |
120 BP |
|
4 Airburst |
40mm aerial burst
grenade. Arcs and
explodes in the air. |
450 BP |
|
4 Riot |
40mm special acoustic
sound. Emits a
glaring flash and loud noise. |
80 BP |
Armor
|
Turtle Vest |
NMC Hunter reinforced
vest. Can be
worn under regular clothing. |
1680 BP |
|
PASGT Vest |
Body armor in current
military use.
Includes an emergency first aid kit. |
2880 BP |
|
Combat Armor |
Heavy police body
armor. Helmet
amplifier prevents Silence. High-sensitivity Motion Detector. |
3250 BP |
|
Tactical Armor |
Modern all-terrain
combat armor.
Includes heads-up motion detector. |
12800 BP |
|
Aya Special |
Aya's custom-made
armored vest.
Outfitted for anti-NMC operations. |
8000 BP |
Items
|
Recovery1 |
Multi-vitamin
tablet. Heals some HP. |
100 BP |
|
Recovery2 |
Analgesic
capsule. Heals HP. |
180 BP |
|
Recovery3 |
Nutritive tonic.
Heals lots of HP. |
350 BP |
|
MP Boost1 |
Spring water.
Restores some MP. |
320 BP |
|
MP Boost2 |
Sparkling mineral
water. Recovers MP. |
580 BP |
|
Penicillin |
Anti-bacterial
medkit. Cures Darkness,
Paralysis, Poison. |
80 BP |
|
Stim |
Restores nerve
function. Cures
Silence, Berserker, Confusion. |
80 BP |
|
Combat Light |
Disposable defense
weapon. Blinds
enemies in front of you. |
60 BP |
|
Pepper Spray |
Disposable
self-defense weapon. Use to
stun surrounding enemies. |
100 BP |
|
Flare |
Disposable
self-defense weapon.
Inflicts darkness on the enemy. |
150 BP |
| One small area of B1,
B2, and |
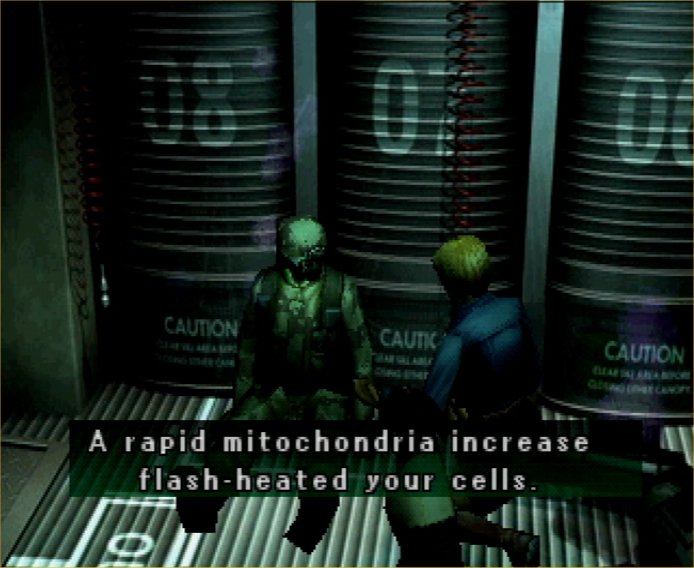 |
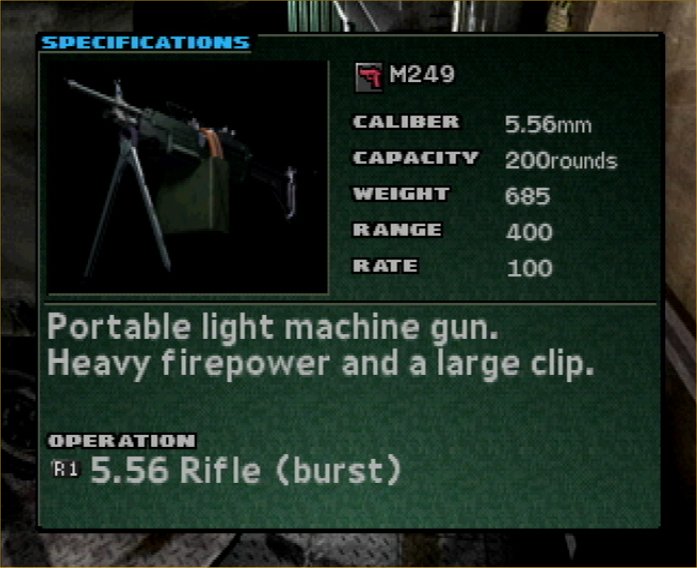 |
Go back to Underground Parking, and you'll find that the supply truck has been moved inside. In gratitude for your saving the blinded soldier, the sergeant brought it in for you, and he has a couple of great new weapons available now. You can get the M249 (Rifle) for 15800 BP and the MM1 (Grenade) for 23500 BP. Also, you'll find your storage boxes in the back of the truck. |
| Now you
can clear out the hot areas. |
|
B1
|
Pod Access
Tunnel
|
6
Sentinels
|
|
B2
|
Pod Access
Tunnel |
Pawn Golem, 3 Watchers |
4 Riot |
|
Septic Tank |
Pawn Golem, 2 Watchers |
50 9mm
Spartan |
|
Main Corridor |
Rook Golem, 2 Watchers |
4 Airburst |
|
Breeding Room |
Bishop Golem |
Protein
Capsule |
|
North
Maintenance Walkway |
2 Pawn
Golems, 2 Watchers |
50 9mm
Spartan, 80
5.56mm Rifle |
|
South
Maintenance Walkway |
Rook Golem, 4 Watchers |
80 5.56mm
Rifle, Javelin |
|
Elevator
Hallway |
2 Rook
Golems, 2 Watchers |
4 Grenades, 4 Airburst |
|
North
Promenade |
2 Pawn Golems |
4 Grenades, 4 Riot |
|
Forest Zone |
2 Pawn Golems |
50 9mm
Spartan, 4 Riot |
|
Pyramid |
2 Rook Golems |
80 5.56mm
Rifle, 4
Airburst |
|
Pavilion |
Rook Golem |
4 Airburst |
|
|
Rook Golem |
4 Airburst |
|
Submarine
Gallery |
Bog Diver |
|
|
Bridge |
2 Rook Golems |
50 9mm
Spartan, 80
5.56mm Rifle |
| Power Plant, north |
Rook Golem, 4 Watchers |
4 Airburst |
|
South
Promenade |
2 Pawn
Golems, Rook Golem |
50 9mm
Spartan, 80
5.56mm Rifle |
|
Savanna Zone |
Rook Golem,
Pawn Golem |
4 Airburst, 4 Riot |
|
Shrine |
Bishop Golem |
Protein
Capsule |
|
Power Plant,
south |
6 Black Beetles |
|
| Go make any necessary purchases and save the game. Make sure you're ready to face the serious enemies. You need recovery items, good armor, at least two good weapons, and plenty of the appropriate ammo for those weapons. When you're ready, go to the Pod Service Gantry. Watch a long and surprising cutscene-movie-cutscene sequence. |
PART 18: TRUTH AND CONSEQUENCES
| Go down to B2. A Bishop Golem will attack in the Pod Access Tunnel. After taking him out and getting the Ringer's Solution, go inside the Pod Bottom and destroy the Ultimate Being. You can use Inferno to great effect on this monster. For maximum points, eliminate the side parts before the main body. After it changes, watch out for its open "eye." For defeating it, you will get a Ringer's Solution, 50 9mm Spartan rounds, 10 R. Slug shotgun shells, and 4 Grenades. Okay, that was Round 1 of the final showdown. You have a break now, so reload, heal, and attach items. When you're ready, search the walkway for a glowing orange light. Examine it, use Bowman's Card, and get ready for the last battle. |  |
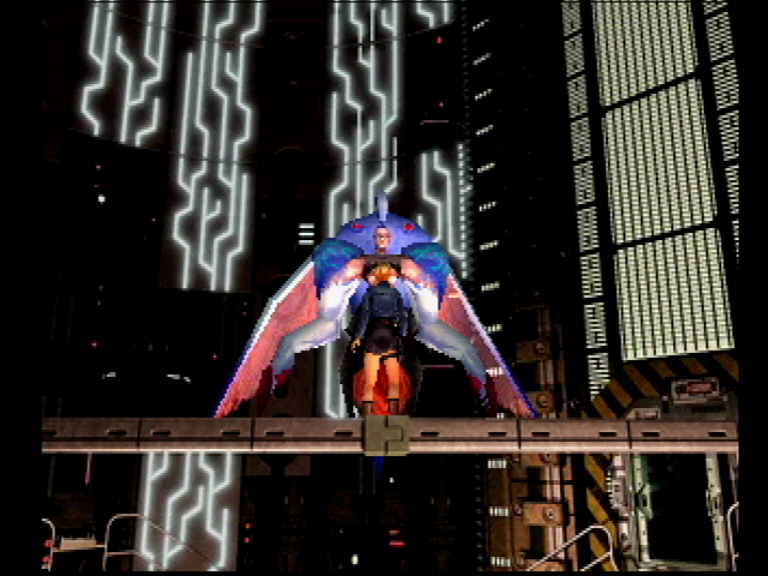 |
Try to stay off the bridge. Grenades with Energyshot can make this battle much easier. (Sometimes this thing did attacks that completely wiped out my MP, and sometimes it didn't. I assume that is random. In any case, don't depend completely on PE here.) Keep yourself healed and free of status ailments, and you should be fine as long as the ammo holds out. After defeating the final boss, sit back and watch the ending movie. If you saved Pierce at the Water Tower, read his memo and called Jodie right away, got him from the Golem Freezer, saved Flint and later gave him Eve's Teddy Bear, and saved the blinded solider, you should get the best and most complete ending. Wait for the credits to roll, and you will get bonus points and a chance to save the game. Now you can do Replay Mode. Whee! |